
Paperbag Scrapbooking: How To Make A Mini Album
Our good friend Terra Merriweather-Schultz from the ScrapbookingStore Design Team did some beautiful paper bag scrapbooking using the supplies from our January Scrapbooking Kit. She first learned how to make these by attending a class at a local scrapbook store. We LOVE this paper bag mini album that she made. Terra was kind enough to provide step by step instructions so you can follow along and make it yourself!
To make the paper bag scrapbooking mini album, you will need the following supplies
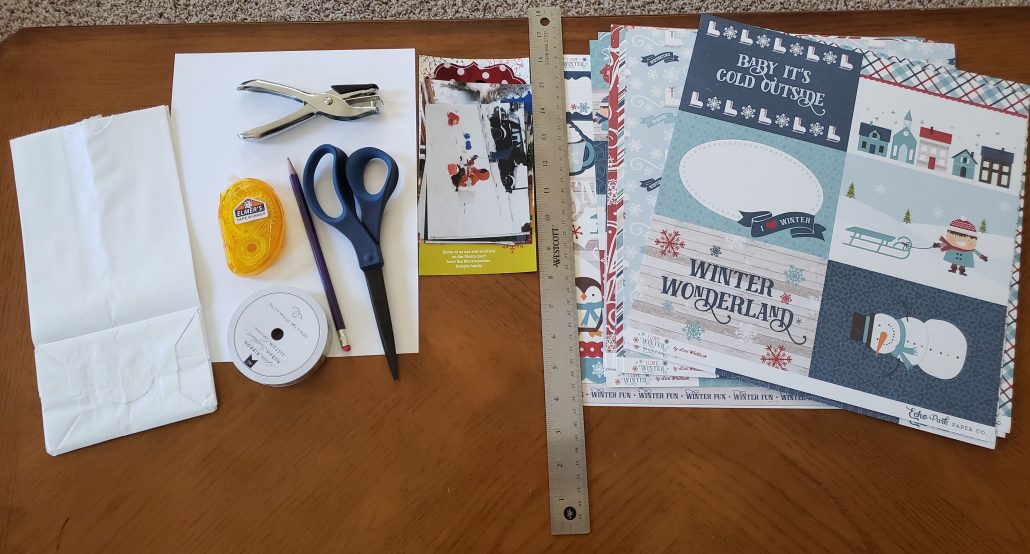
- 3 white paper lunch sacks
- scissors
- white card stock
- ruler
- pencil
- hole punch
- double stick adhesive
- ribbon
- paper kit
STEP 1:
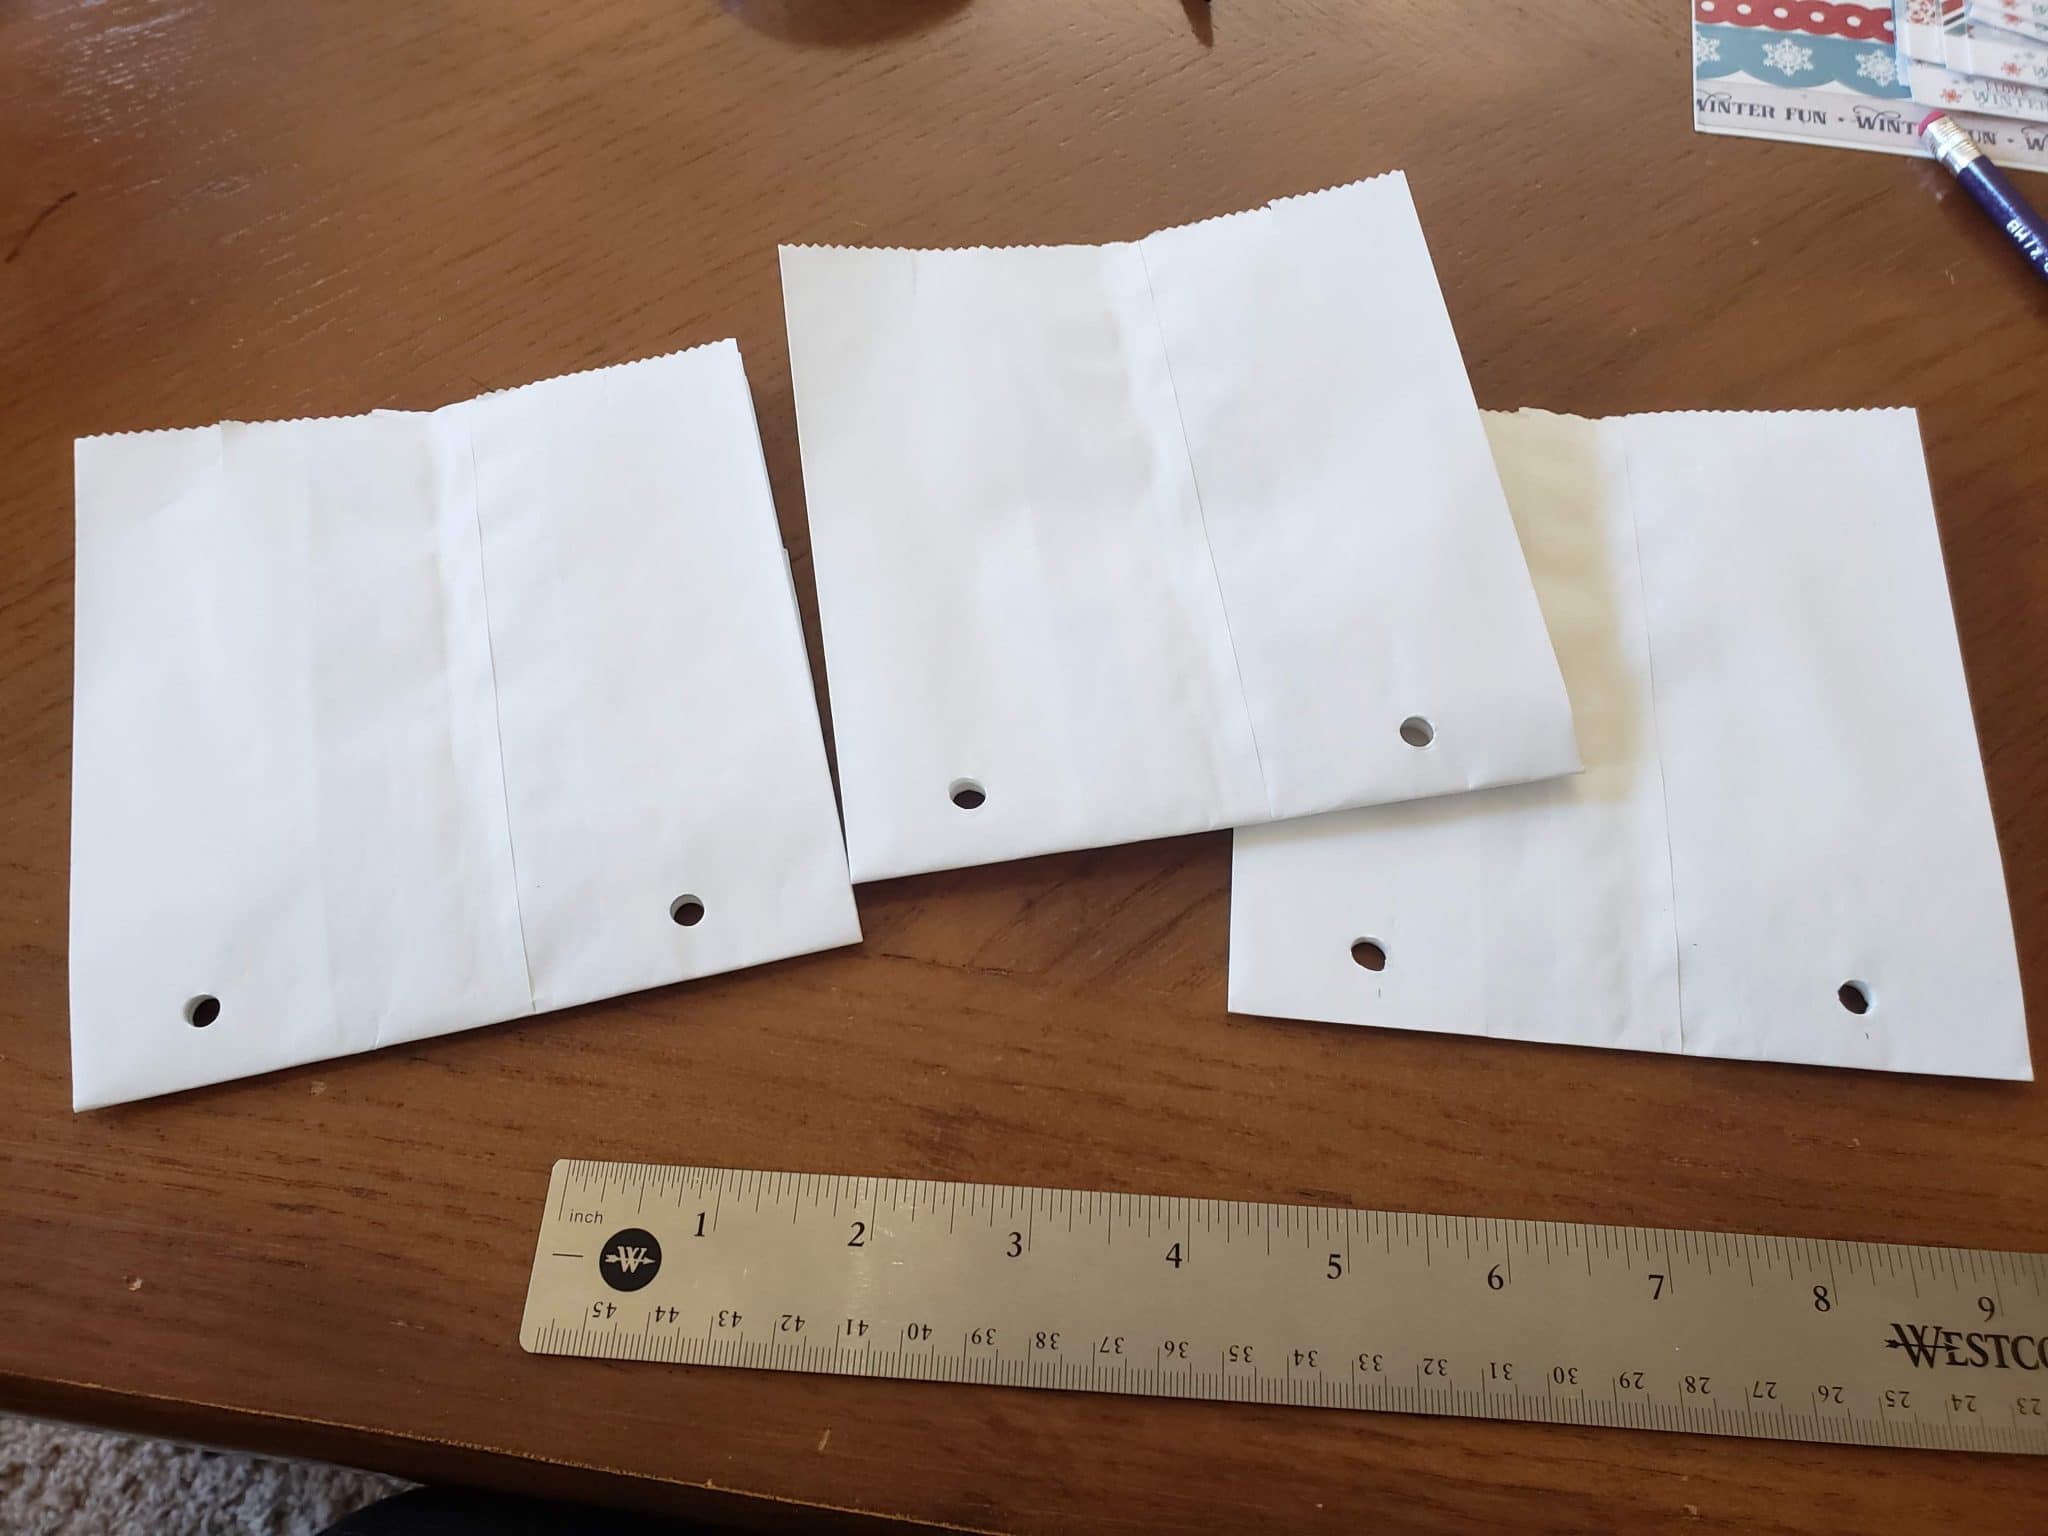
Begin by folding your paper bag in half. You will want the end with the folded bottom on the interior. At the creased half, make a mark one inch from the top and another mark one inch from the bottom. Then make a mark one quarter of an inch into the bag. This will be the bottom of your hole. Punch one hole at each mark.
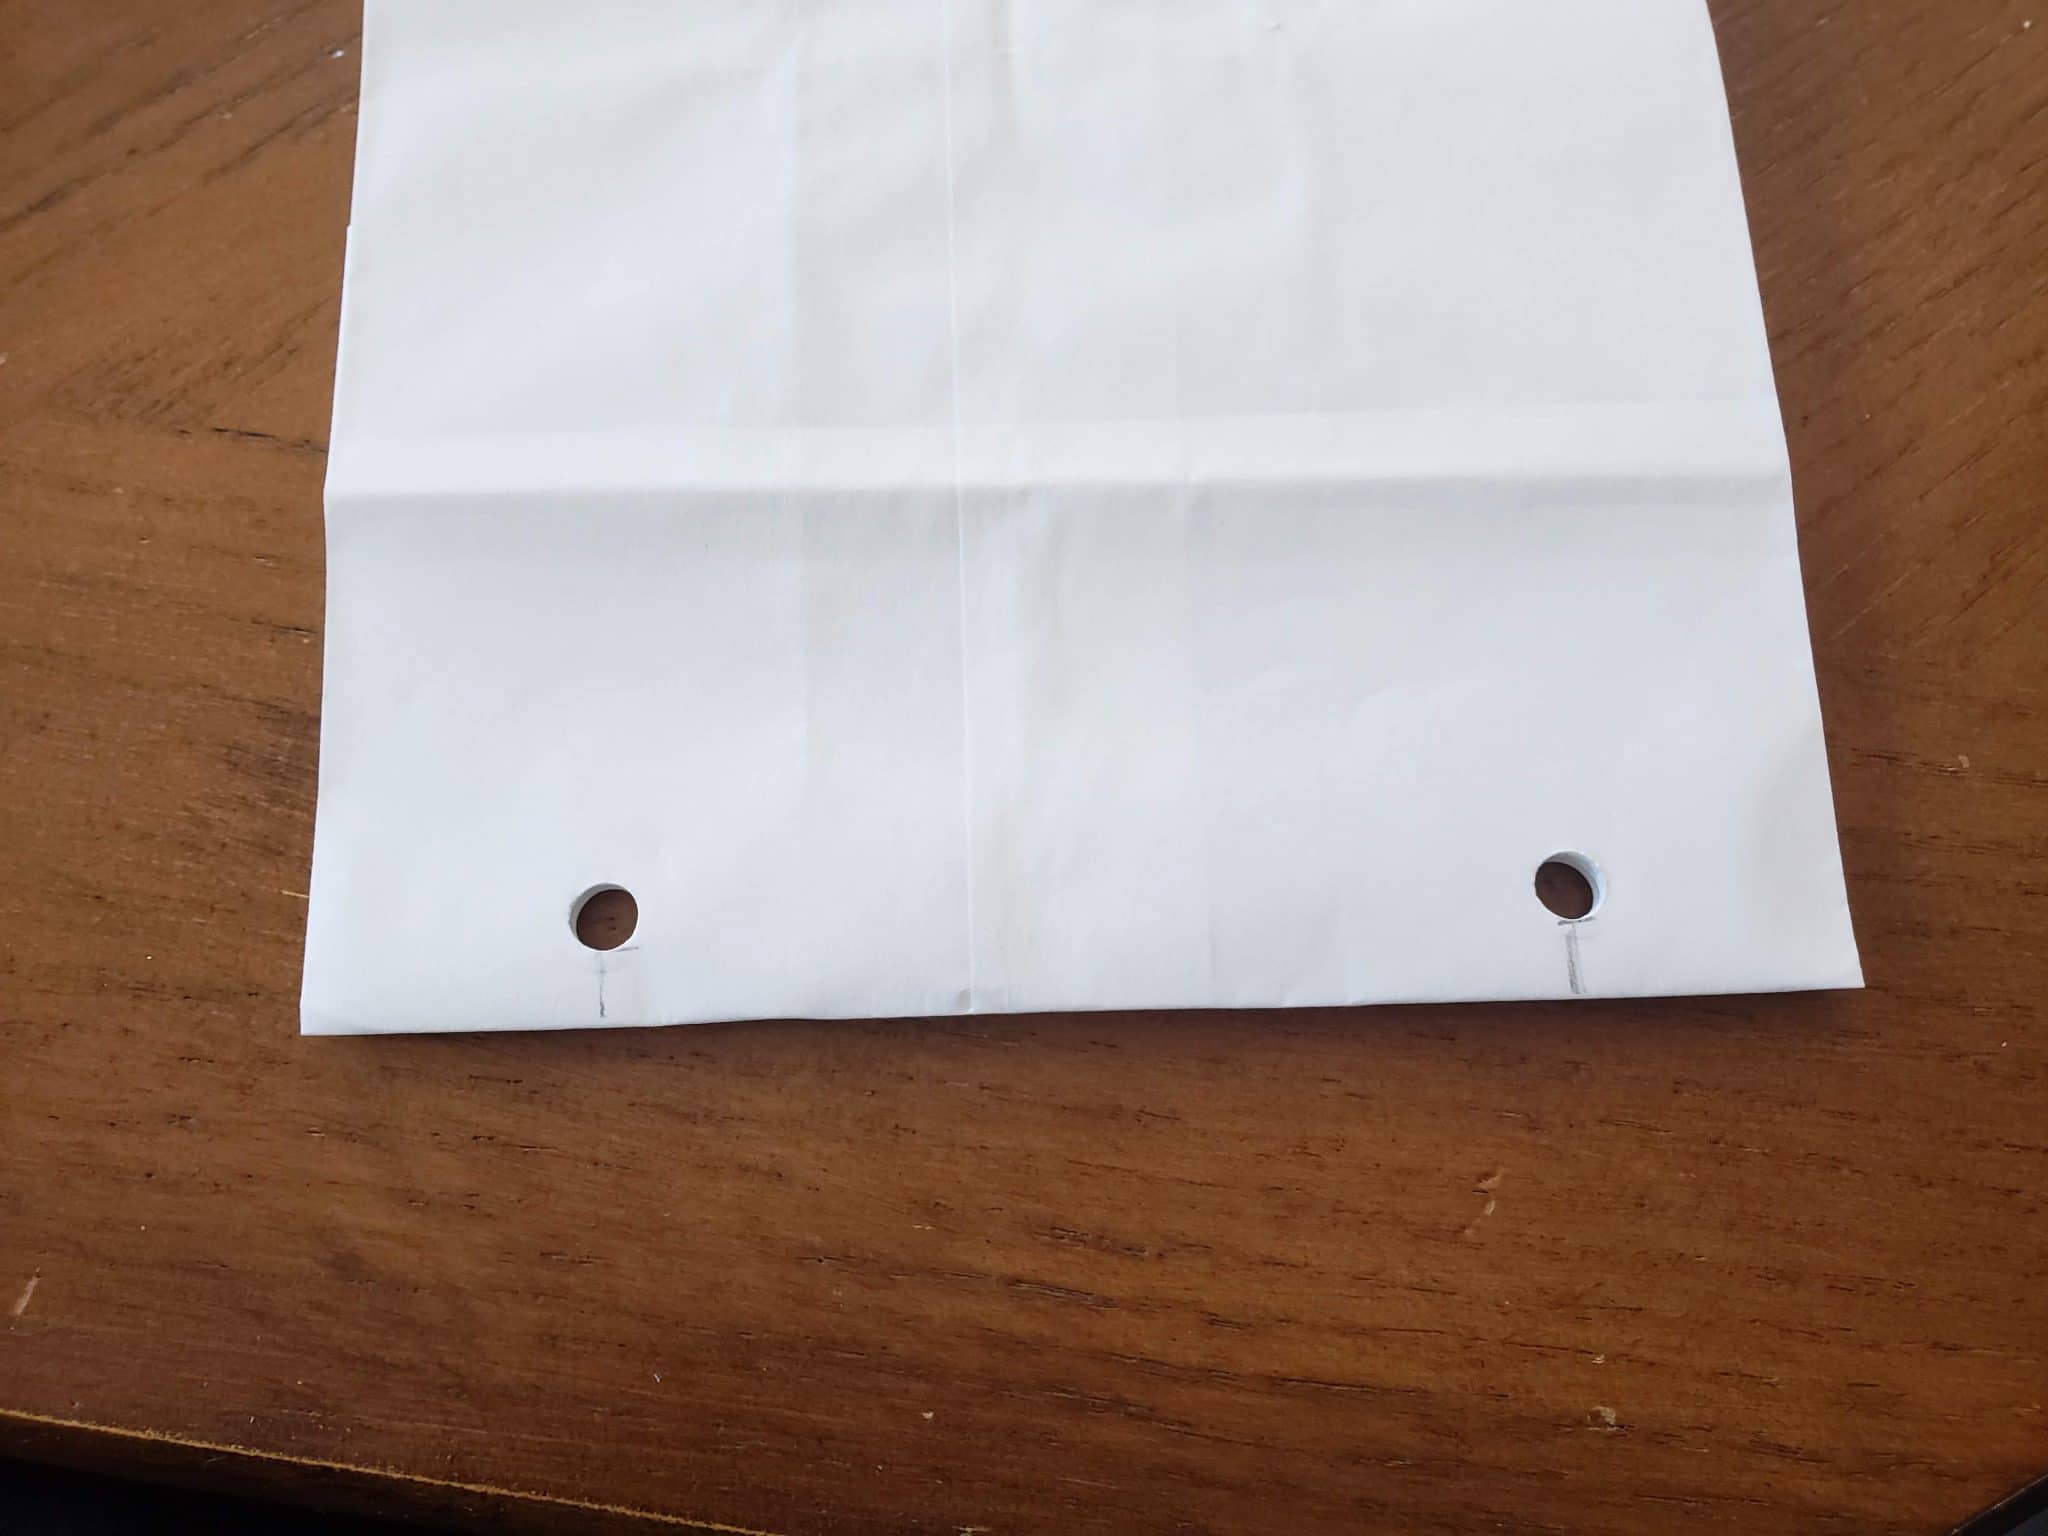
Use this paper bag as a template for the other two bags.
STEP 2:
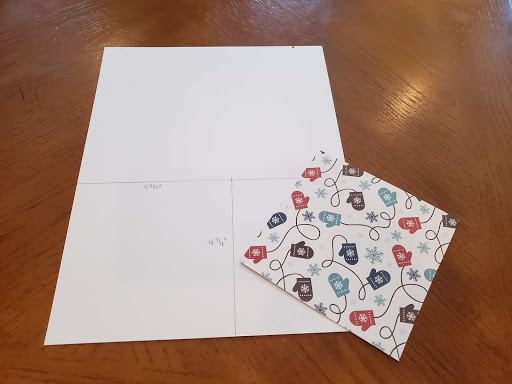
Using your white card stock, create a 4 3/4″ x 4 3/4″ square. This will serve as a template for the picture base for your album pages. Using this template, cut out 9 additional squares for your album (this will include the front and back covers, as well as several pages in the middle).
STEP 3:
For a page that has the folded bottom, you can either use a 4 3/4″ square to cover the whole page (if you do this, you will need 3 more squares), or you can use double sided adhesive to create an interior pocket (see 2nd photo below).
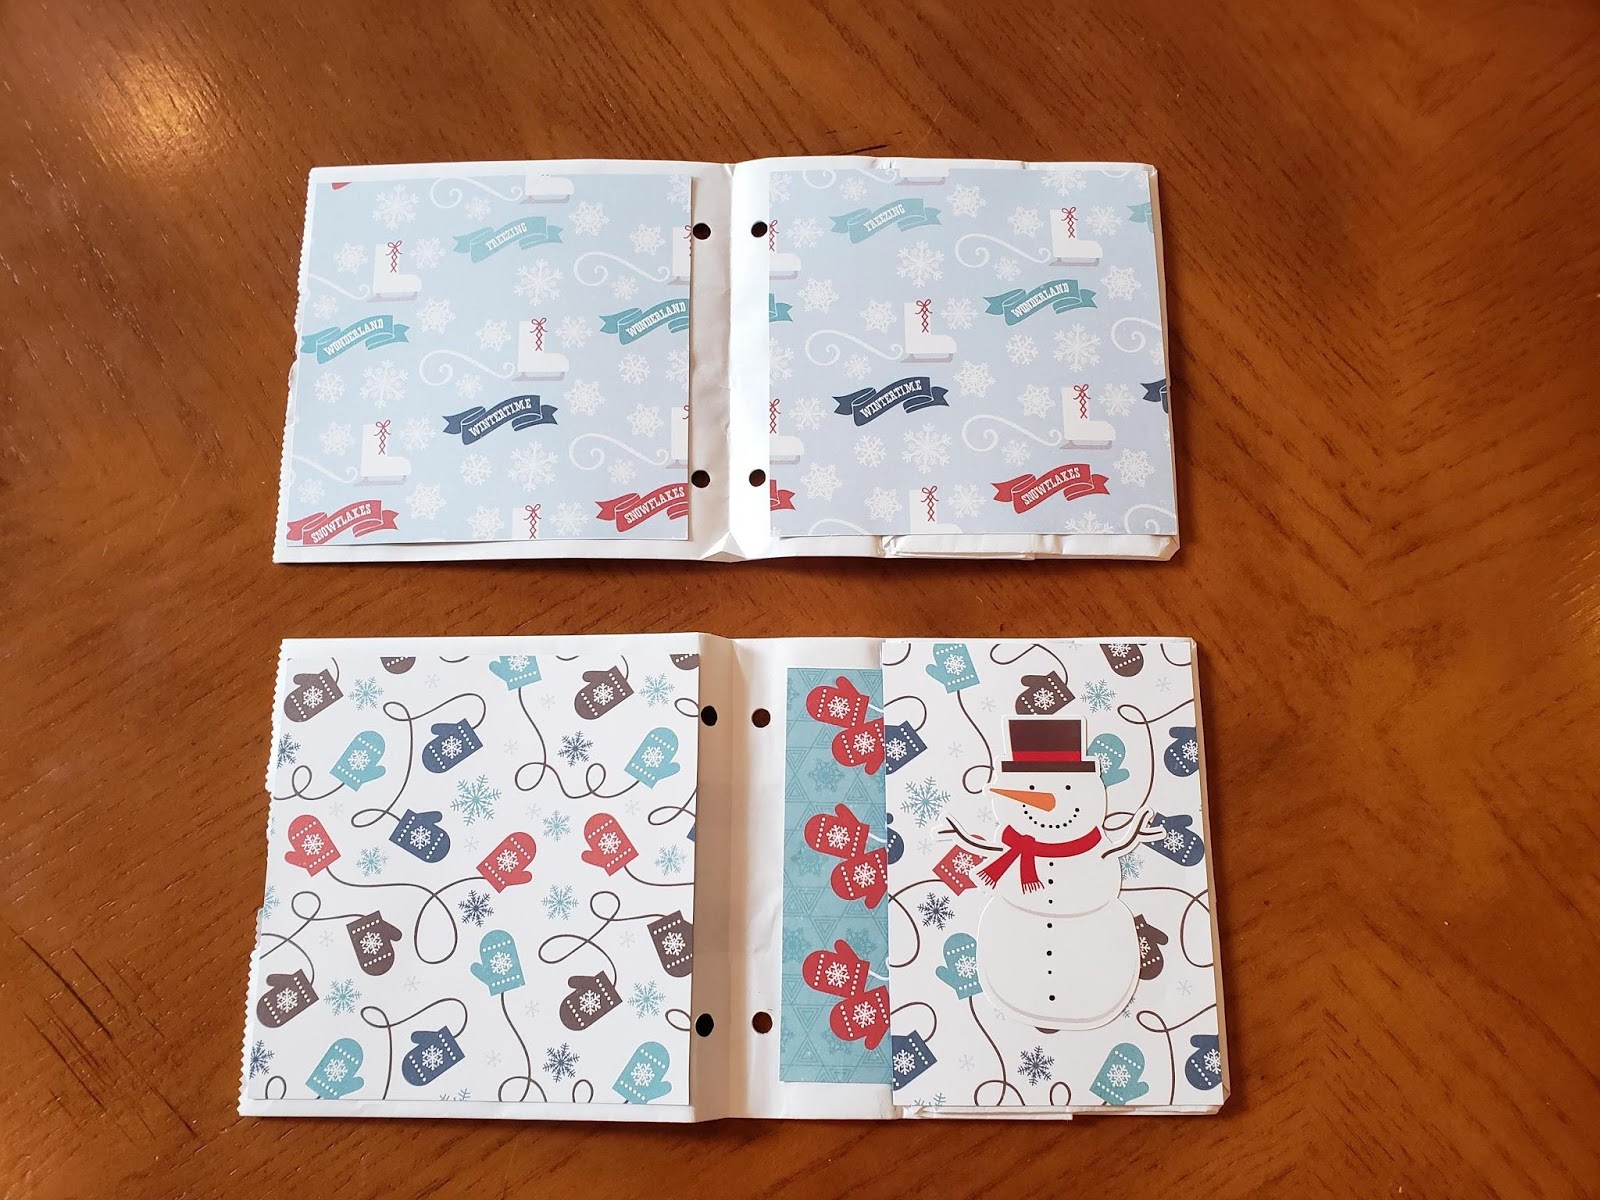
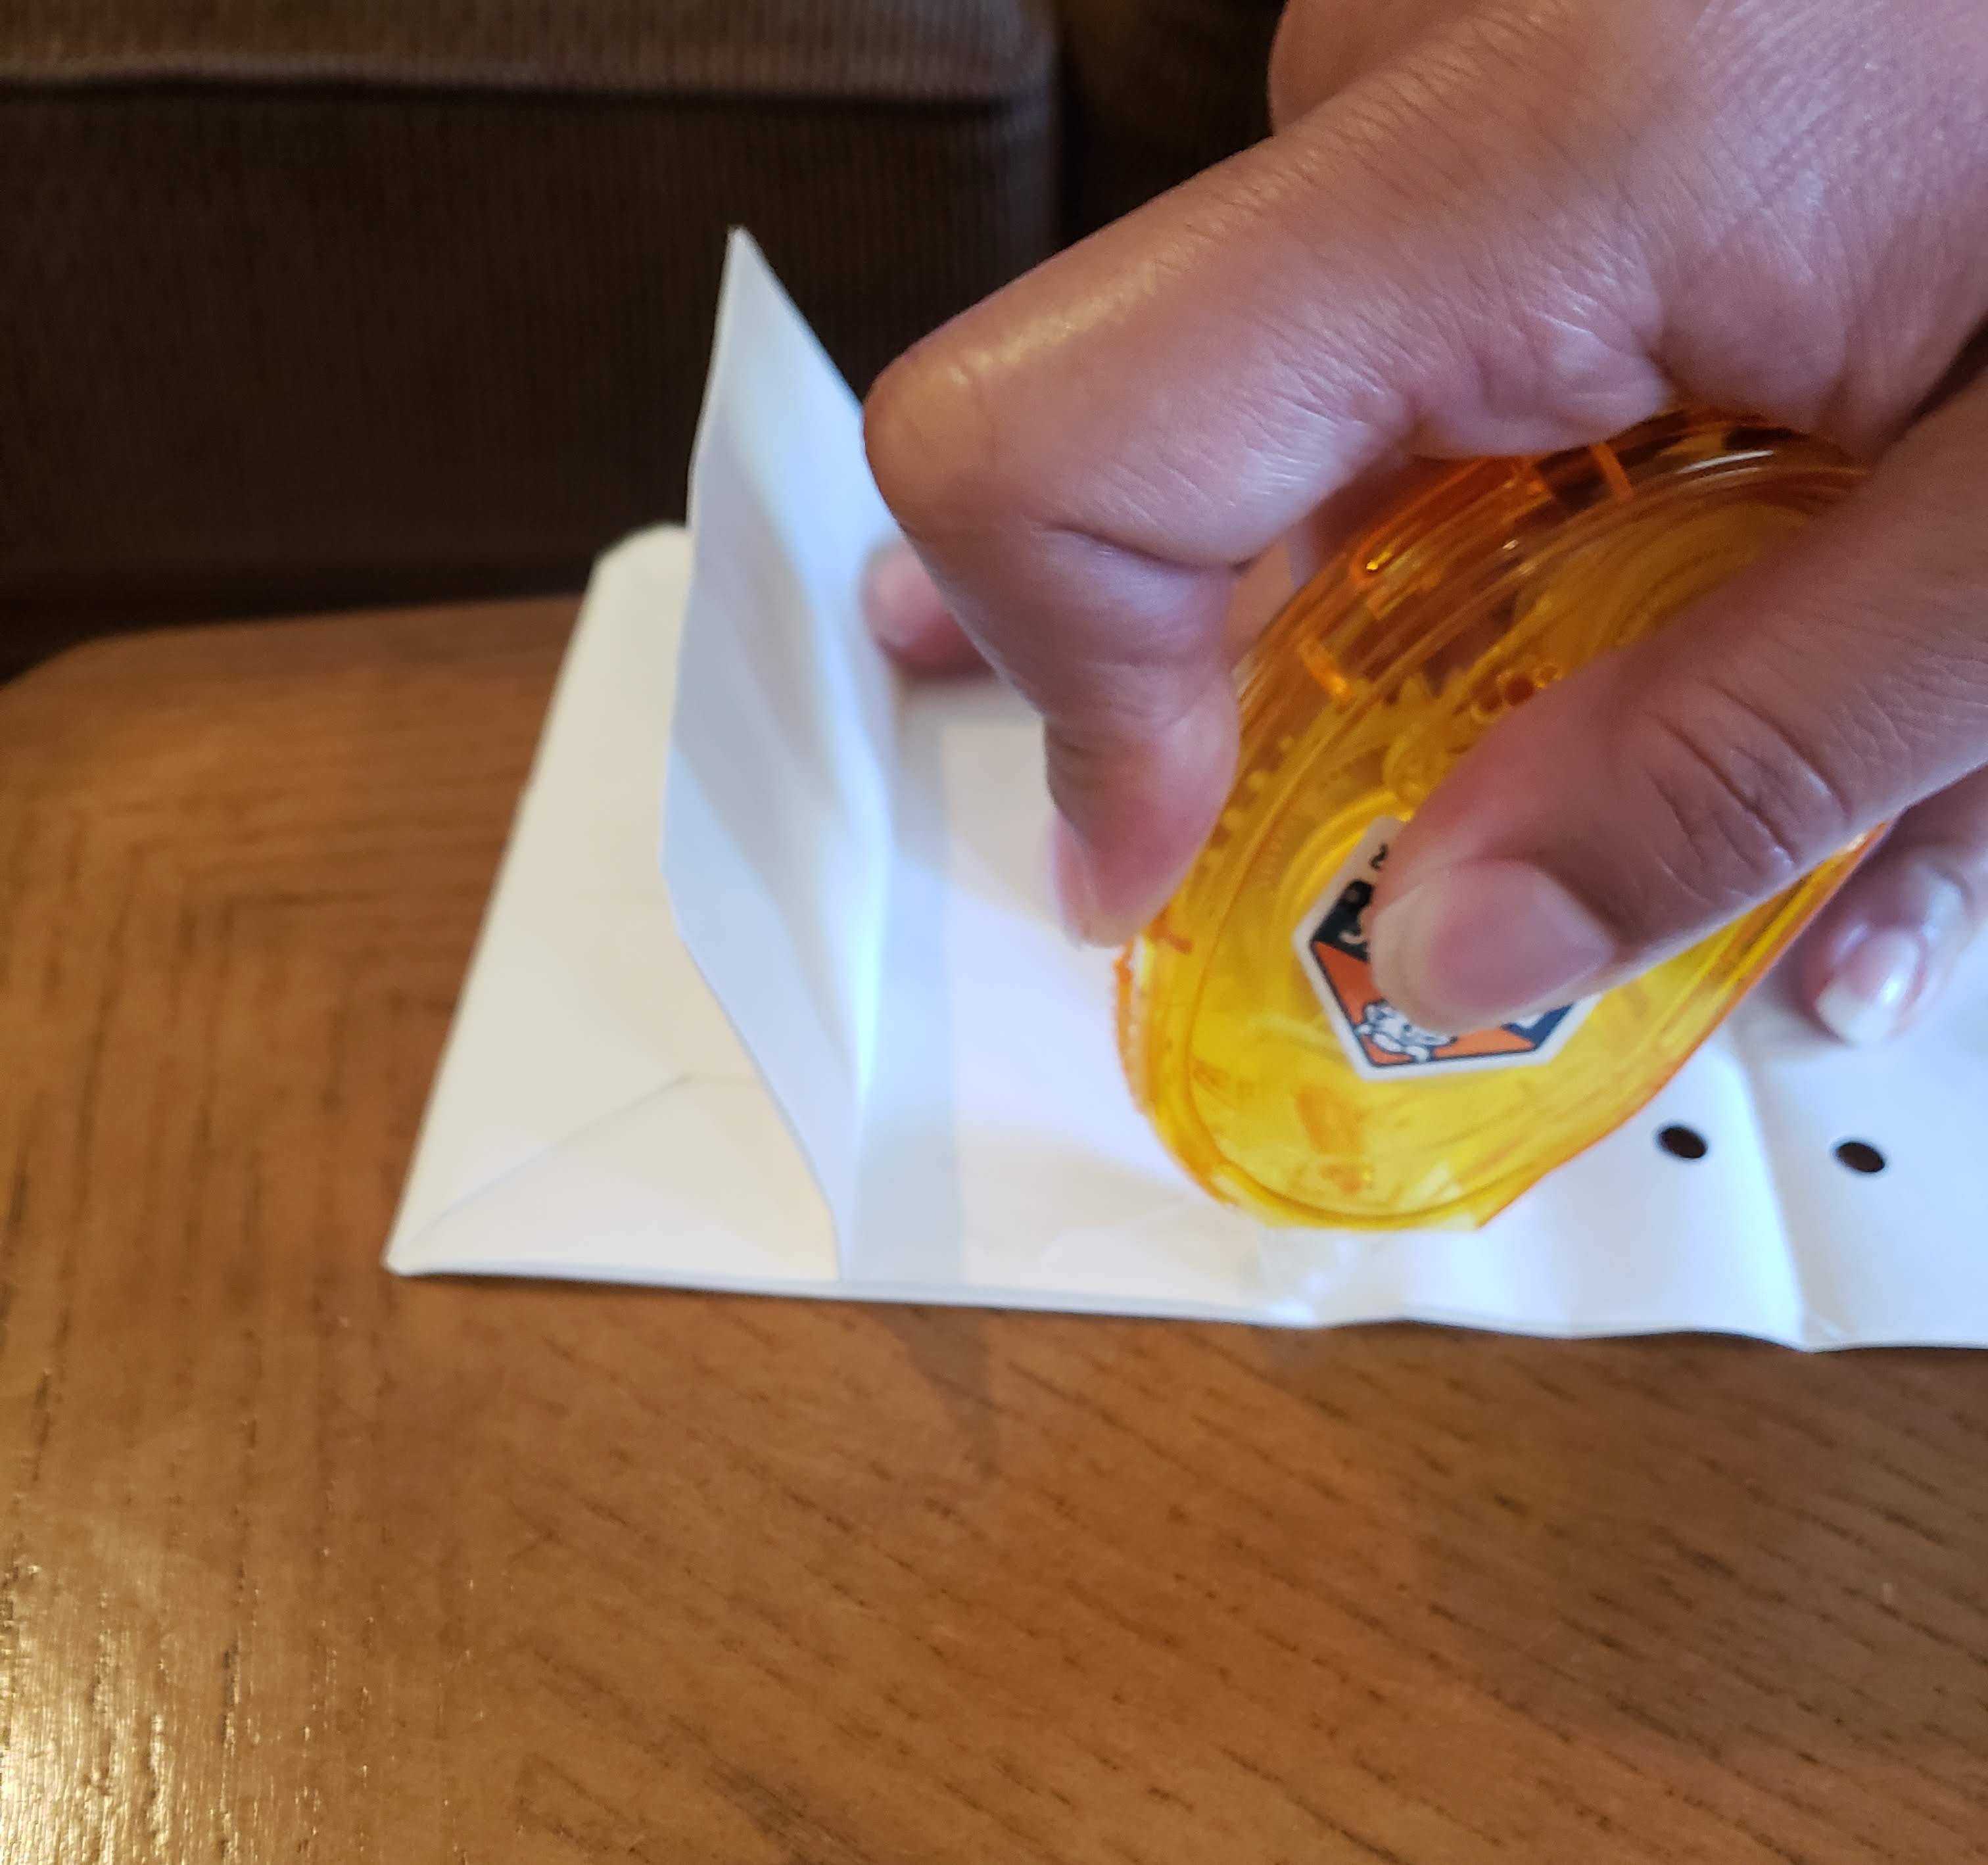
When attaching to the bag, be sure to glue closer to the edge without the holes.
STEP 4:
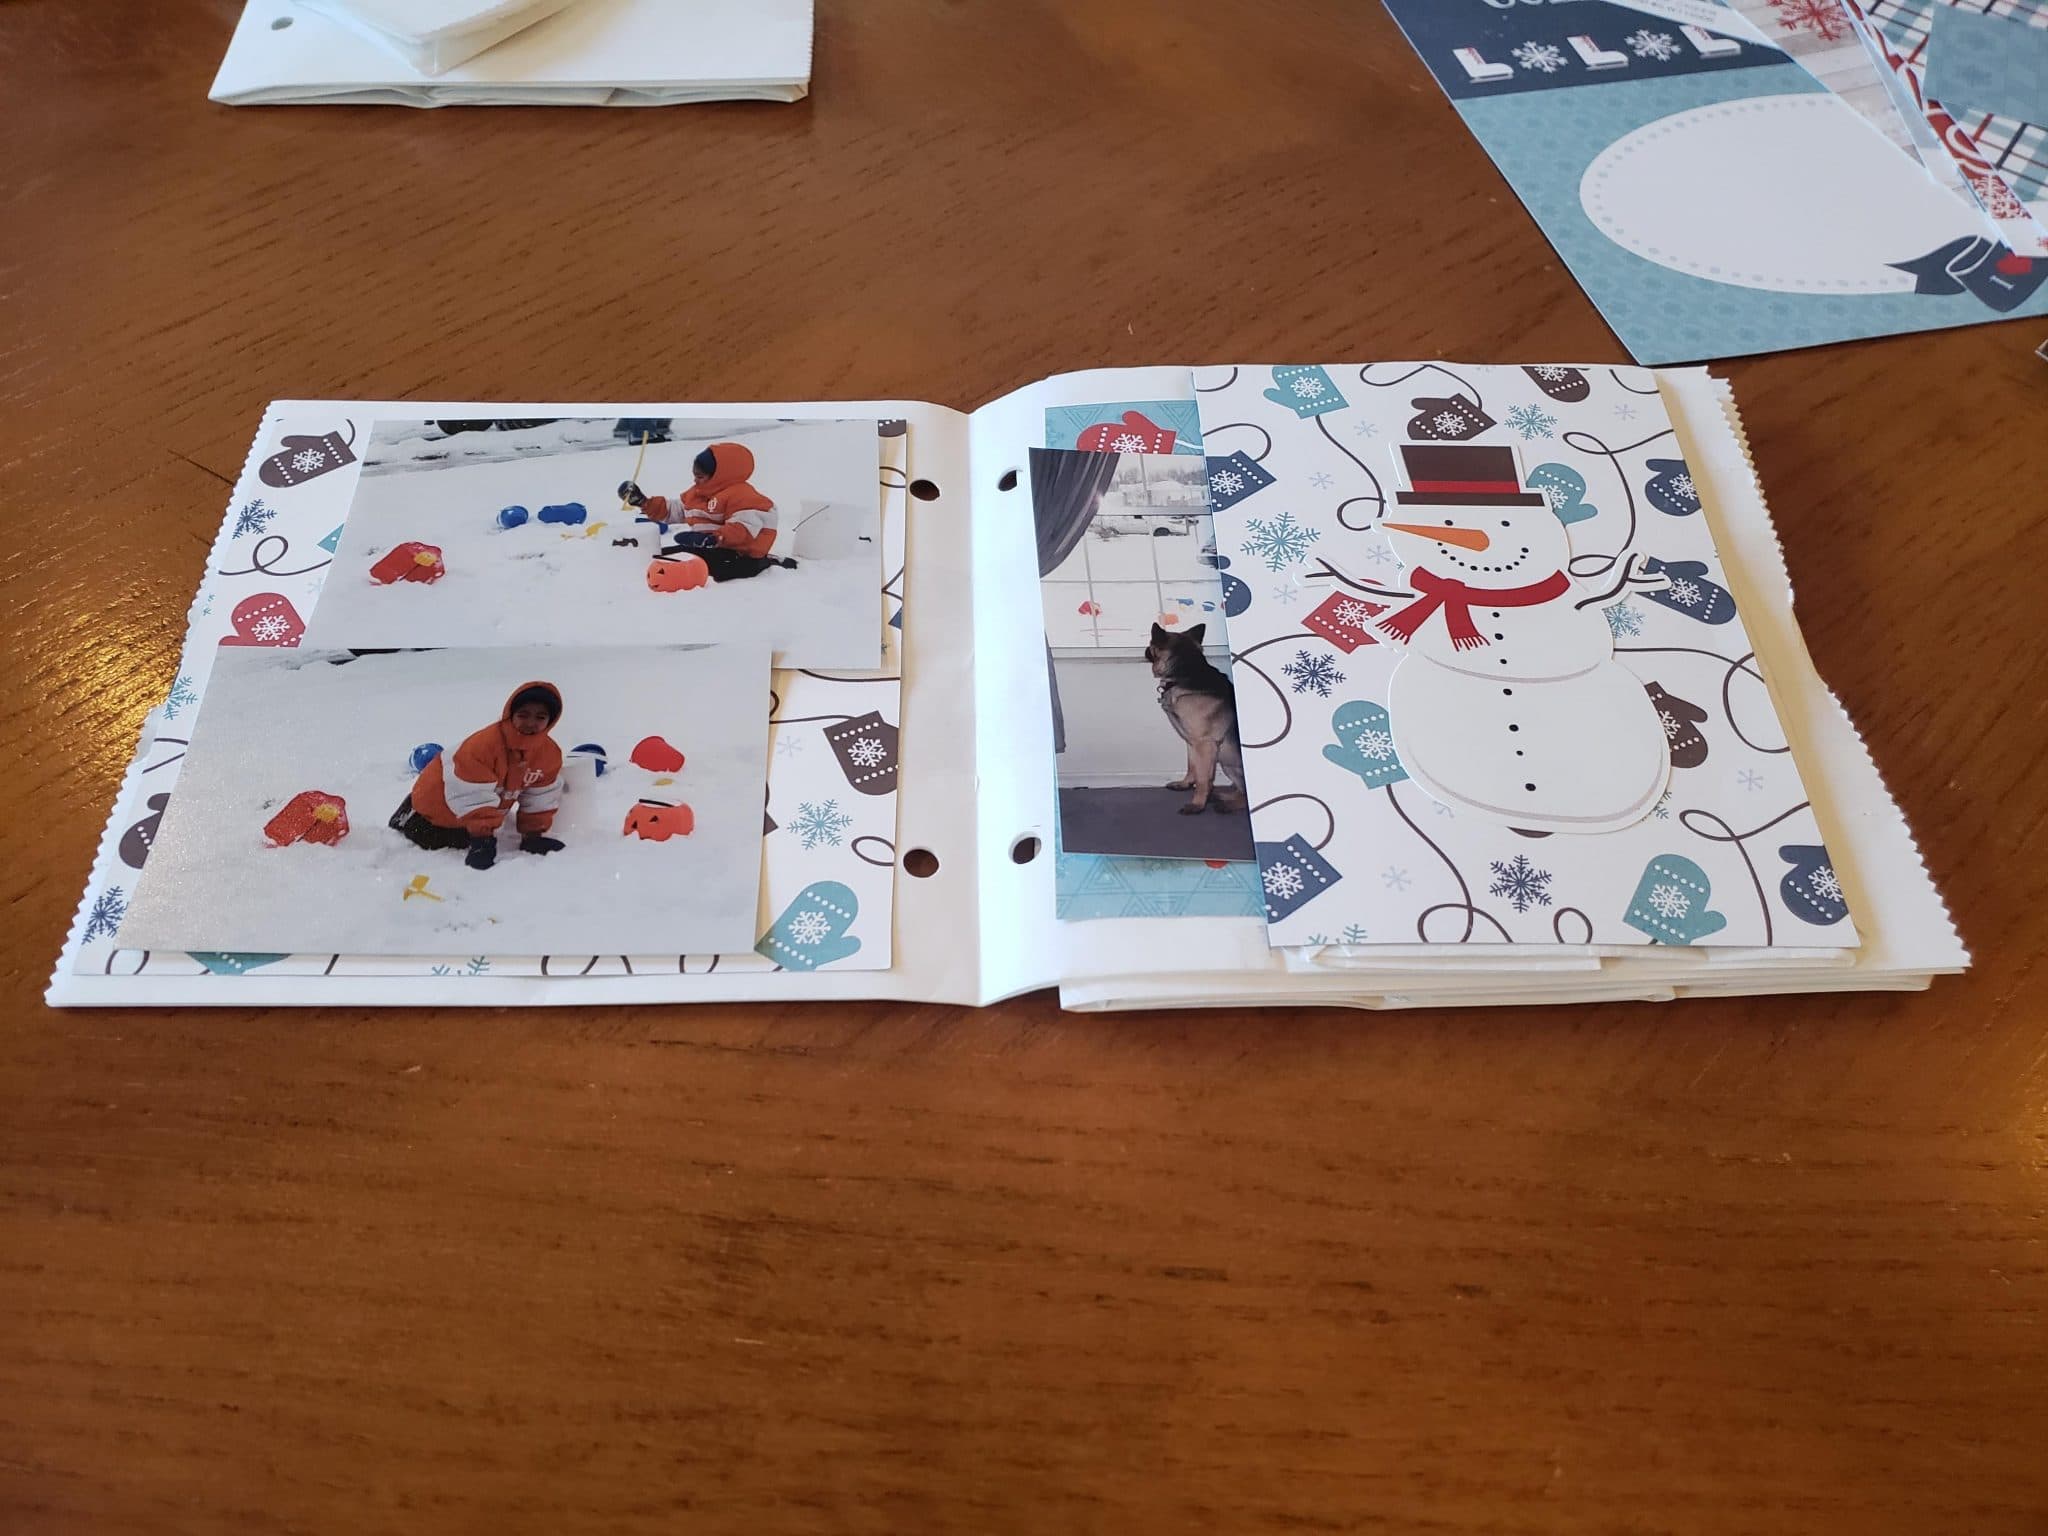
Once you have all of your base squares attached, decorate your album with pictures and stickers!
STEP 5:
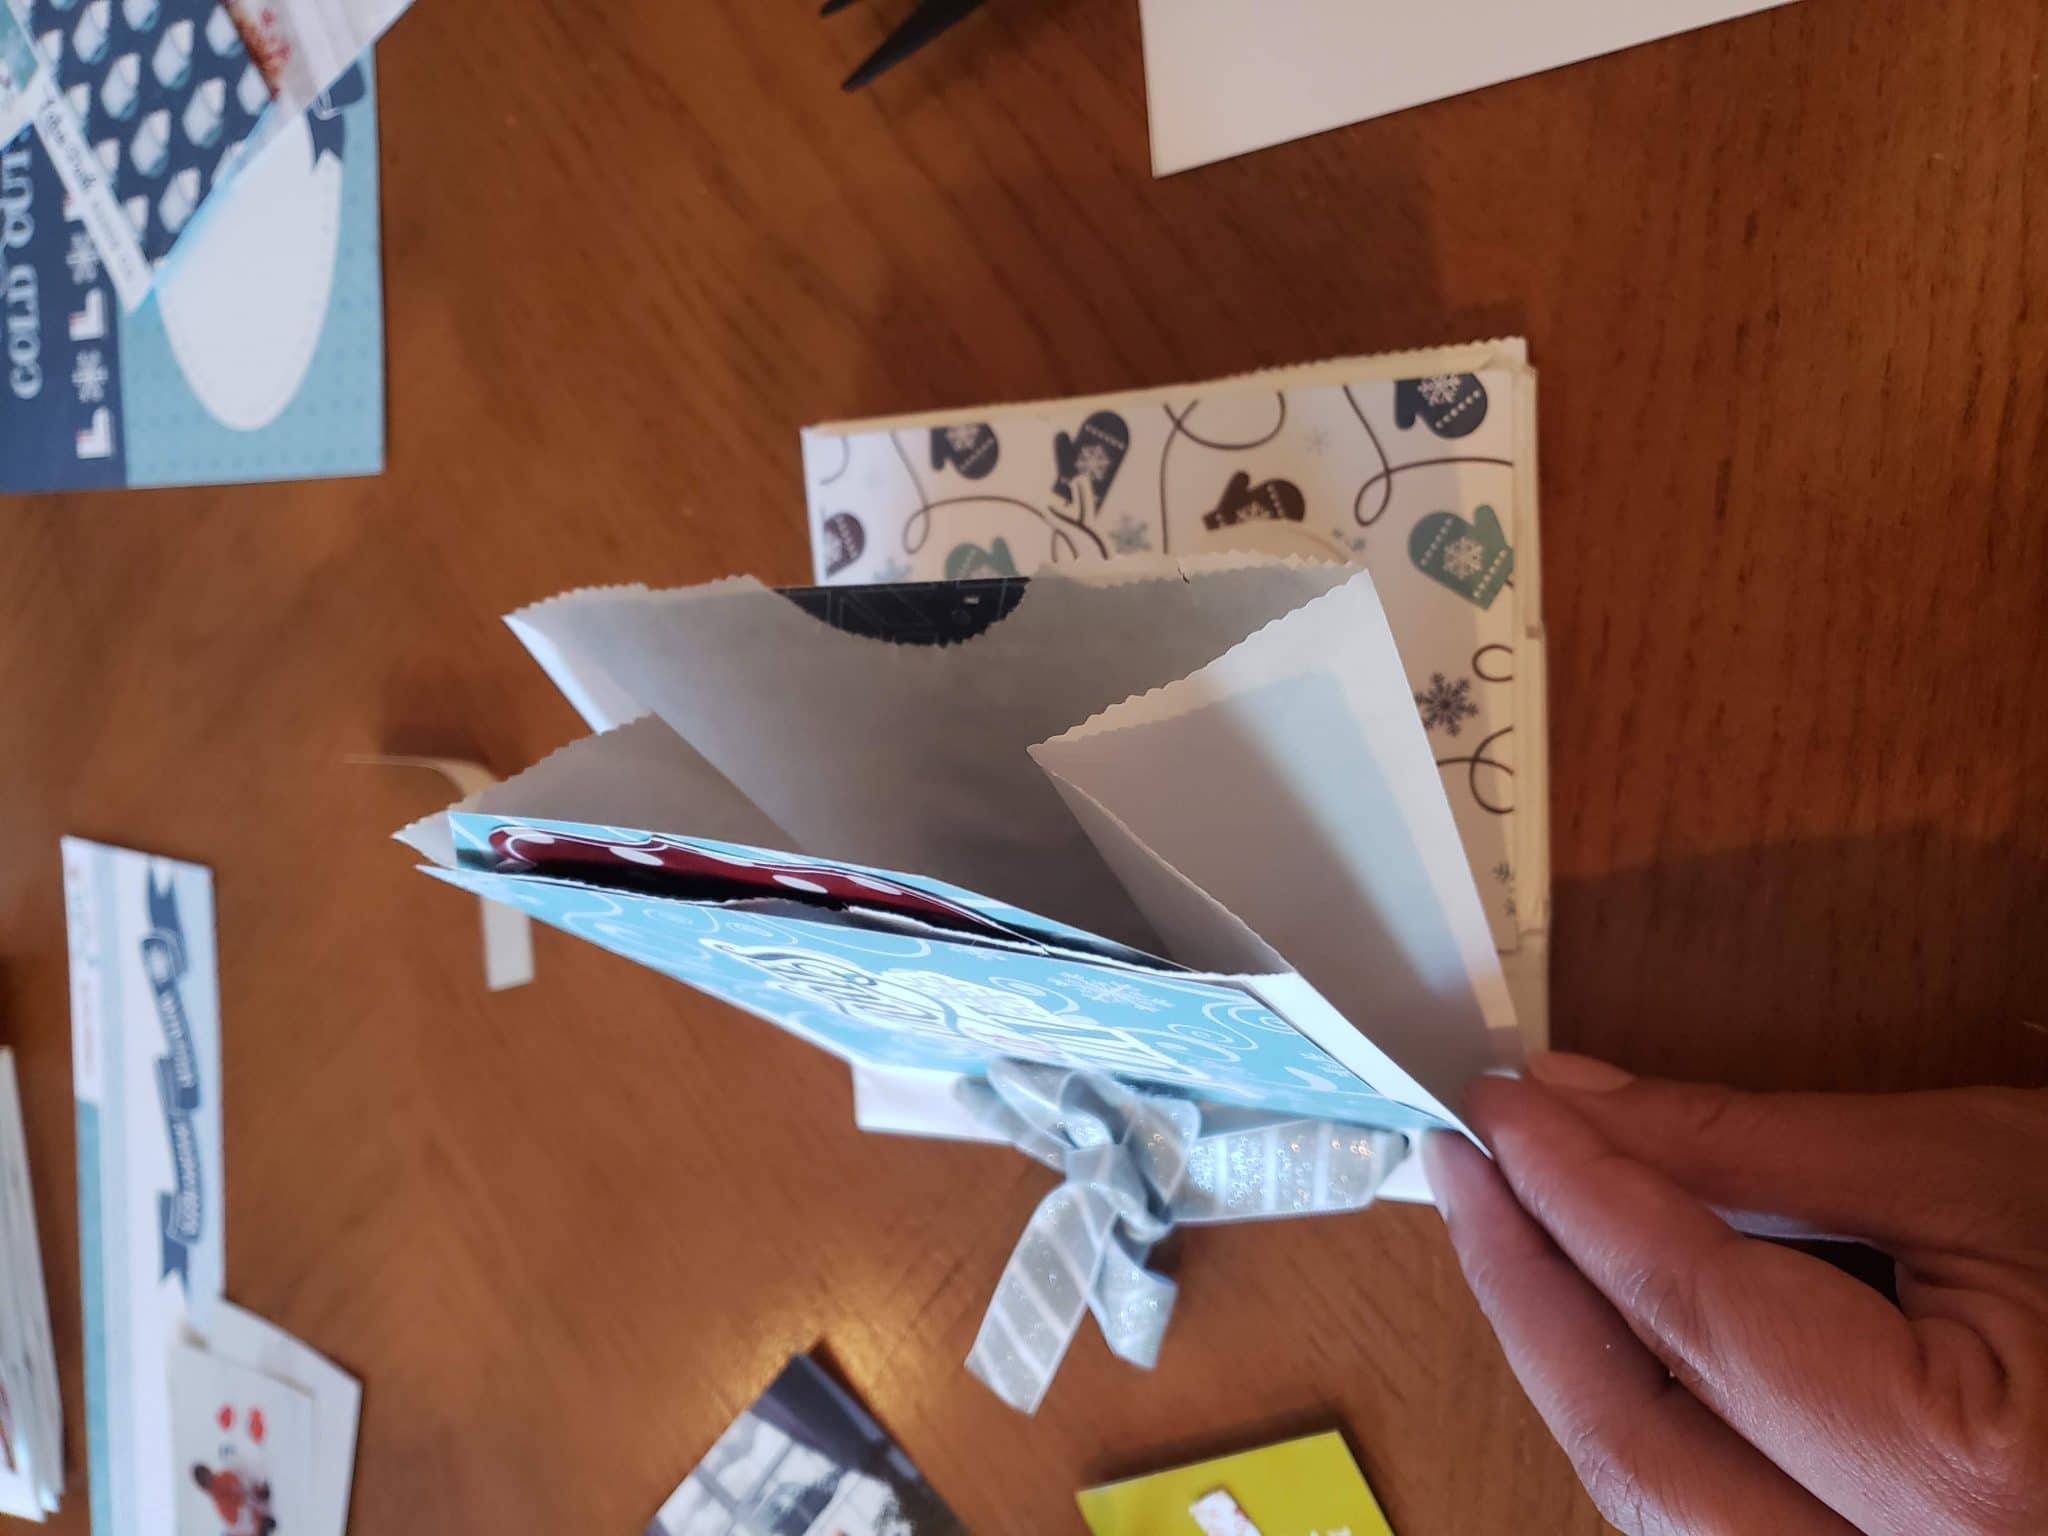
To complete your project, take a long piece of ribbon (leave a bit of room in case you want to add more bags in the future) and tie the bags together.

BONUS:
But wait, do you have more photos than pages in your album?
If so, the top portion of your bag can also hold pictures! Create a tag template by drawing a rectangle 4 3/4″ W x 5 1/4″ L on cardstock? Draw a line one inch from the left and the right on the top, and one inch down on both sides, connect the two lines, and cut at the diagonal. Create several more tags using this template that can hold pictures on both sides.
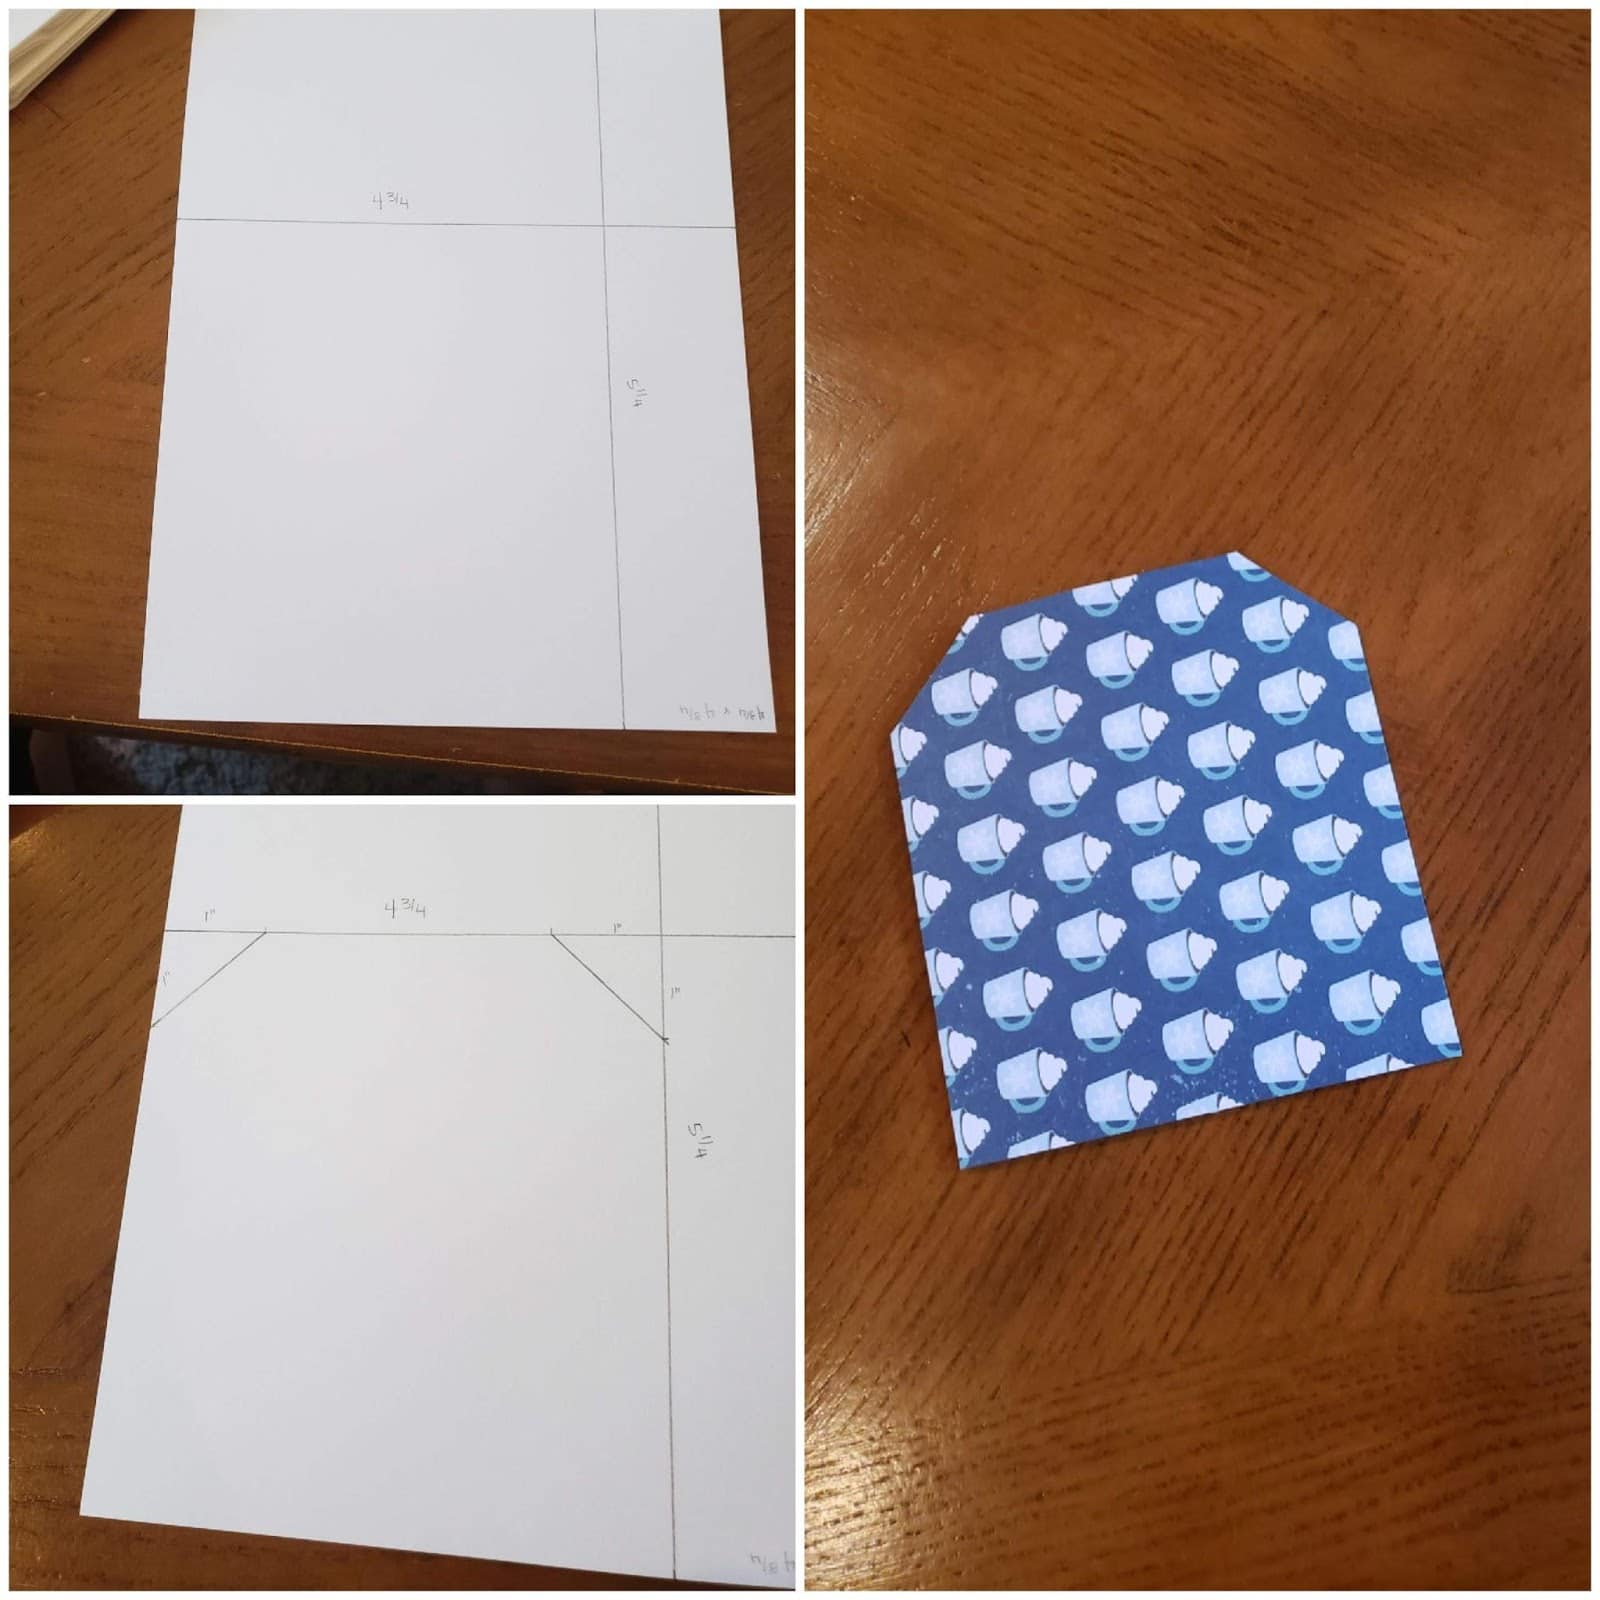
Leave the tags as they are or punch a hole in the top and add a ribbon for easier removal.
Happy crafting!
We’d love to see how your paperbag scrapbooking mini album turn out! Tag us on Instagram or Facebook to show us what all you create!
You can also see more of Terra’s stuff on her personal Instagram.
And if you have questions, leave them in the comments below and we’ll be sure to answer!

love it….