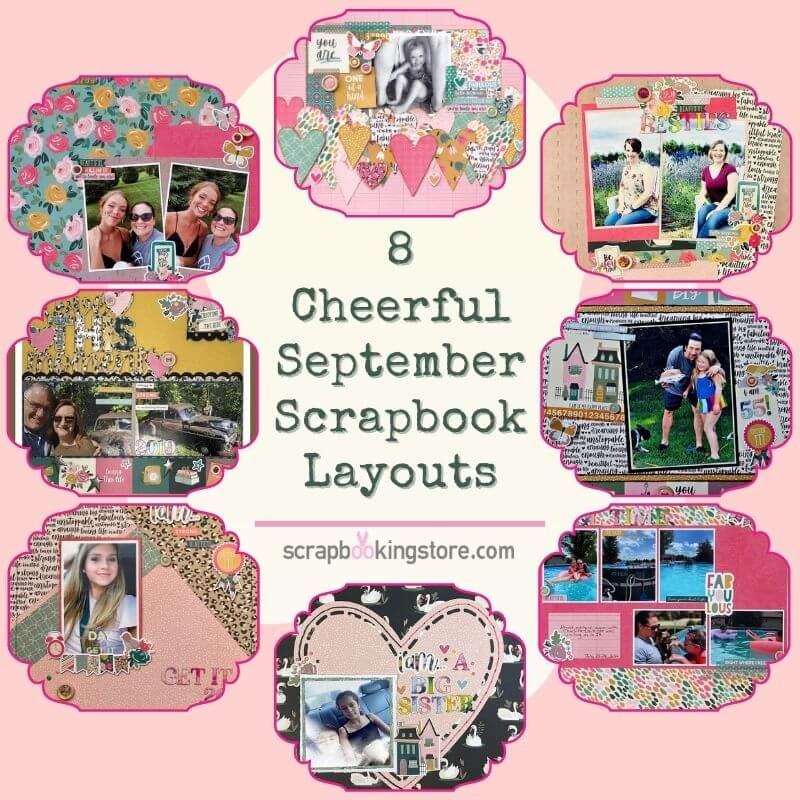
8 Cheerful September Scrapbook Layouts
This month's kit is perfect for celebrating the beautiful people and relationships in your life. Our awesome Design Team members have created cheerful scrapbook layouts using our gorgeous September kit, the I am 2020 collection by Simple Stories.
1. I Am a Big Sister by Beth Soler
Starting with Beth’s layout, she used the Swan paper Beautiful item #12405 as her background. Also, she used the light pink paper Fabulous item #12409 and cut a 9.5-inch heart on her Silhouette machine. She adhered the heart to the center of the layout with double-sided tape and then poked holes around the outside of the heart. Next, she stitched one side of the heart with dark gray embroidery floss and the other side of the heart with pink embroidery floss. Then, she matted her photo which is a little larger than a 4x4 with paper Elements item #12413.
Beth, then used a paper sander and roughed up the edges and then matted the photo again with white cardstock and roughed up the edges of the white cardstock. Next, she adhered the photo with Nuvo glue because she thought that it would hold best over the embroidery floss.

The Upgrades this month are fantastic! Beth used the thickers and the title I AM from the sticker sheet for her title. Also, she adhered the thickers with Nuvo glue. Then, she used the house stickers from the sticker sheet for the bottom right of her photo and a floral sticker for the top left of her photo. Lastly, she scattered enamel dots around the layout to add glitter on it.
Get to watch more cheerful scrapbook layouts on Beth's Youtube channel!
2. Crushin' It Layout by Marci Bensing
Marci chose a photo of her brother and his daughter on his birthday in late August and printed a 5 x 7. To start, she always lay everything out that she's going to use and get started with the "base" of the layout. She cut them into strips the "cut-a-parts" paper and used one on the top and one on the bottom of the page. Then, she cuts a ¼” strip of the mustard colored side of the “cut a parts” piece and adhered it as a border at the top and bottom of the page.

Marci double matted her photo first with a 1/8” border in a cream-colored cardstock and then a ¼” border using black cardstock (from her stash) and adhered the photo at an angle. Next, she cuts apart the HOUSE piece and fussy cut out the clipboard and tucked and adhered them to the left and right of the photo. Her base is now complete and it's time for additional embellishing! Marci loves to use twine on almost all of her layouts, so she twine bordered each of the mustard colored strips to make them pop on the page.


For the embellishments, she started adding each of the large “cut a parts”. On the house piece, she added popped word strips, a piece of the washi strips and a button with a folded butterfly stick below it. On the clipboard: a button, a popped-up bird sticker, "55" using the Thickers, and a popped-up badge. Finally, she added a butterfly button to the lower border strip to balance the layout. She then used every aspect of the beautiful papers and embellishments from this SEPTEMBER COLLECTION! Have fun!
Visit Marci's blog now and see more adorable scrapbook layouts!
3. Beautiful Besties by Meggy Blethen
Megan had a hard time cutting into this kit because it was just so pretty. Here is how she made this layout. She picked out the butterfly patterned paper for the background. Next, she printed her photos at about 4x5 and matted each photo with the pink polka dot paper. She cuts the dark pink paper to about 7.25x7 inches and glued one of the border strips at the bottom of the dark pink paper.

Next, she cut the word phrase paper to about 6.25x10, then tore off the top part of the paper to create a fun edge. Also, she cut the pink polka dot paper to about 3x4.5 and placed it at the bottom edge. She layered all these papers under the photos and added the title to the top cluster.


Lastly, she added the washi tape, sticker embellishments and the buttons to 3 different cluster areas on the layout. Watch more cheerful scrapbook layouts on her YouTube channel!
4. Love This Moment by Melissa Bierlein
Melissa started her layout with a mustard colored cardstock (from her stash). She layered the photos on top of the green buffalo check paper and added metal photo corners from her stash on the photo strip. Then, she used several phrase stickers from the sticker sheet at the center of the photos. The strip of paper going down the center is also from the kit to represent a signpost.
She added 2019 on the right photo from the Thickers included in the upgrades. Also, she placed the scallop sticker from the sticker sheet at the top backed on a black scallop from Bazzil from her stash. Next, she used a strip of 2X2” squares at the bottom. The square on the right was the coffee cup that didn’t work with the layout. She cuts own the ’so happy’ square and mounted it on top with foam tape. Finally, she embellished the strip with sticker stars, wooden buttons from the upgrades and metal stars from her stash.

For the Title Area, Melissa used a cut file from Cut2You by Gwen ~ ‘love THIS moment’. She cut the file using fun paper from the kit and also backed the open areas with paper from the kit. Next, she adhered with foam tape. She then added the wood buttons and the enamel dots from the upgrades.
TIP: Melissa always hates to use a corner of several papers to back a cut file so she commonly uses the first page of the kit that shows all the different designs to back her cut files!

Upper right of the layout: She used the ‘Enjoying the ride’ journaling card and cut it down a bit. Melissa backed it with the green buffalo check and used an embossing folder to give it some dimension. Also, she added part of a Bazzil scallop piece at the bottom and attached it with foam tape. She then embellished the area with stickers from the kit and enamel dots from the upgrades. Get to see more of Melissa's gorgeous cheerful scrapbook layouts on her blog!
5. Prom Scrapbooking Layout by Samantha Taylor
Sam's niece is so gorgeous inside and out. She just knew the theme of September's kit would be perfect for scrapping a few prom selfies she got with her niece. She started her layout by using a 12" x 12" piece of I Am Fabulous for the base. Also, she cut an 8" x 5" piece of Beautiful paper included in the kit and attached it vertically to the base. Then, she cut a 6" x 8" piece of Fierce paper and layered it horizontally onto the layout.

Next, Sam attached two 3 1/2" x 5" photos to the layout. She printed her photos with a white border around them and layered some washi stickers onto the layout. As for the title, Sam used the alphas included in the upgrades to make a title. Lastly, she embellished her layout with stickers from the Combination Card Stock Sticker Sheet and buttons.

6. Pool Time Scrapbooking Layout
The bright colors in this collection were begging for bright pool photos. You can never have too many summer days in the pool. Sam used a 12" x 12" piece of 3x4 elements as the base for her second layout. She cut a 7" x 12" piece from the Beautiful paper in the kit and attached it horizontally to the layout. Then, she attached the photos to the layout. She used 3 vertical and 2 horizontal wallet-sized photos.

Sam added journaling to this layout. She cut a journaling tag from Blooming paper and attached it. Also, she used the alphas from the upgrades to create a title. Finally, she embellished with stickers from the Combination Card Stock Sticker Sheet, washi stickers, and buttons.

Check more cheerful scrapbook layoutss on Sam's blog now!
7. You Are One of A Kind by Sara Mishler
Sara started with the Blooming paper as her base and she used the soft pink grid side. She cut two 6X6 squares to stagger behind her photo using the Dreaming paper. All her papers are inked with Vintage Photo Distress Oxide ink. Then, she went through the cut apart sheets and fussy cut all the hearts she could find which turns out to be one, so Sara grabbed the hearts from the sticker sheet too..lol
Also, she cut the die cut using a metal die set to make more hearts from the papers. Sara knew she wouldn't use those papers as a background. Next, she cut a few extra from white cardstock from her stash to layer behind some of the die cuts to create a "faux" chipboard look for some of the hearts.
TIP: You could use any simple shape die, cut file, or punch for this)
Sara created a border using all her die cut shapes or punches along the bottom of the staggered papers. She left a few of the tops of the hearts loose so she can tuck the photo in under them. Also, she used a 4X4 photo with a white border but any size photo will work. Next, she popped the stickers up on foam tape and scattered them around the border.

Finally, she chose a cut apart piece to add as her title and placed it beside her photo. She also used the washi strips to give the impression that the washi is holding the photo and title piece down. Lastly, she added a small cluster of embellishments using the stickers and wood buttons in three different spots on your layout, keeping the design centered on the page.
Watch how Sara makes her wonderful inspirational scrapbook layouts on her YouTube channel!
8. Get It 20 by Shannon Allor
This month, Shannon shared a double-page spread with the left side being completed and the right side just waiting for more photos. These layouts were made with a combination of the I Am Collection 4x6 Elements, Amazing, Fabulous, 4x4 Elements and Fierce Patterned papers.
Shannon started her double page layout by choosing her base papers. She then matted her photo with the bright pink 4x4 Elements to make sure that it popped right off the page. Then she popped her photo up more on some foam squares.

The layout is on a bit of a diagonal with the sticker elements both popped up and flat to create interest. The Wood Buttons and Enamel Dots added the right amount of movement and circular elements on her layout. Finally, the title was made using the Thickers in the Upgrades in all pink and coral tones. Make sure to watch how Shannon did this layout on her YouTube channel!
These are just some of the layouts our Design team shared with us. More are coming all month long this month on our Facebook club members page.
Don't forget to visit our online store! We’re adding new items all the time. Visit our blog for more craft and layout inspirations using our scrapbooking kit.
Join our exclusive Facebook Community for Club Members. It will grant you access to amazing layouts and content made by our design team, fun monthly contests, FREE Facebook Live tutorials (Sept. 23rd) and you'll get to meet other crafters!
Haven't subscribed yet? Now's your chance, be sure to sign up today!
GET OUR MONTHLY KITS DELIVERED TO YOUR DOOR!

Beautiful colors in papers in wonderful patterns. I think this one is exceptional because of the layouts displayed. Lots of talent!