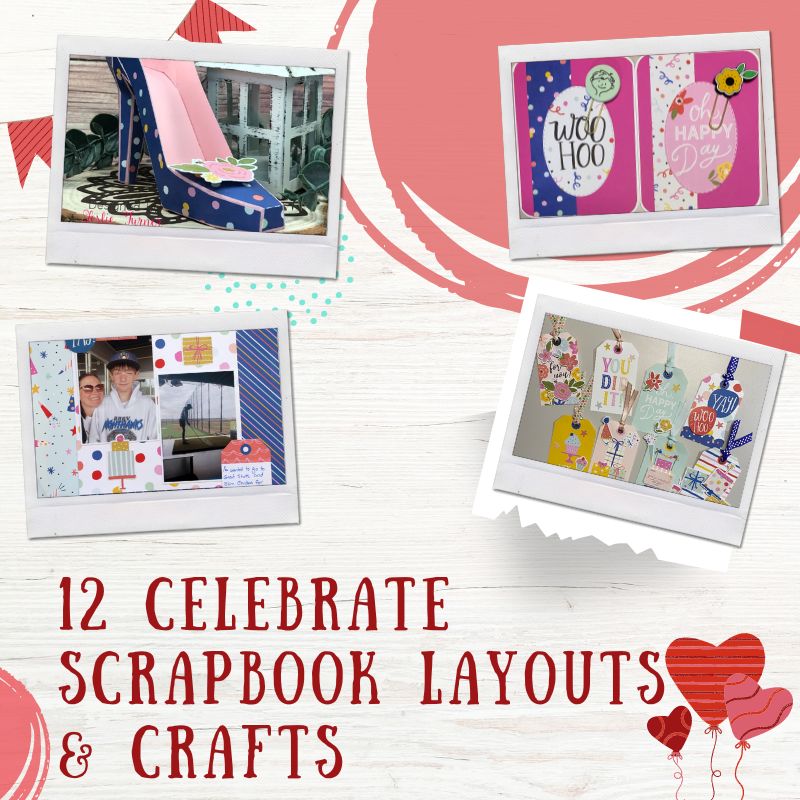
12 Celebrate Scrapbook Layouts & Crafts
Celebrate every occasion with our lovely September 2022 collection, Celebrate by Simple Stories. Add some cakes, party hats, confetti, stars, stripes, with lots of tags and journaling cards to your beautiful projects. Get inspired to finish them with these celebrate scrapbook layouts and crafts from our awesome Design Team members.
1. Happy Day! Scrapbook Layout by Samantha Taylor
From where Sam lives, the kids can get their learner's permit and moped license when they turn 14. She loves the kit since it's not only for a birthday theme but also a celebration themed kit. There were so many fun ways to shout "Yey!".

For this layout, she first used a base of large dot paper. On top of that, she layered a 10" x 10" square of small dot paper. Then she added her photo and created a border to the right side of the photo with three journaling cards. Finally, she embellished it with stickers from the included sticker sheet and a decorative clip from the upgraded embellishments.


2. Yay Scrapbooking Layout by Samantha Taylor
Now that Sam’s kids are older, their birthday celebrations look a little bit different. She likes that this kit is versatile enough to use for any kind of birthday celebration. Sam started this layout by using the birthday icon paper as a base. She layered a diagonally cut piece of blue stripe paper on top of that. Next, she added a 8' x 8" piece of large dot paper.

She added some photos. She cut a tag from the tag paper to use as a journaling spot. Finally, Sam embellished with stickers from the included sticker sheet. Get to see more celebrate scrapbook layouts & crafts on Sam's blog now!


3. Hey Cupcake! Scrapbooking Layout by Meggy Blethen
Meggy decided first in picking out her desired background paper and 2 3x4 photos. She then math the photos with 2 different patterned papers then later she pick out a 12x12 piece of paper and cut out the 2 borders and angle them on the layout how she wants them to look.

She took the cut patterned paper and cut out 4 tags from it. Then she used an ink for all the edges of the photos and tags. Next, she glued 2 tags on the right of the photos and glued the photos Lastly, she added the 2 other tags on the top left corner and embellish it with her likings. Voila! She's all done! Make sure to watch Meggy on her Youtube channel and get to watch more celebrate scrapbook layouts.


4. The Twins Turn One Scrapbooking Layout by Lori Carson
Lori selected patterned paper for the background and then matted the photos on coordinating solid card stock. She used the alpha letters for each of their first names from the add-ons.

Lori also used coordinating tags and stickers from the paper pack and the ribbon add-on to complete the look.
5. Eight Gift Tags Layout by Lori Carson
Using the cut-a-parts from one of the patterned papers, Lori embellished them with stickers, popping some of them up, then adding ribbon from the add-on as well as from her stash.

6. Party Cards by Lori Carson
Using the #ShowUsYourSheetLoadAug2022 layout and cutting instructions from Call Me Crafty Al, Lori made 12 cards using 3 of the 12 x 12 sheets from the pack using solid cardstock from her stash for matting the cards. Then, she embellished them with cut-a-parts, stickers, and some epoxy dots and gems.


7. Wohoo Card by Lori Carson
Two cards featuring the paper clip add-ons. Lori's plan was to use them as bookmarks and will be gifted with a note inside the card explaining to the recipient to use them as such. Don't forget to watch more of Lori's celebrate scrapbook layouts and cards on her YouTube channel.

8. 3-D High Heel by Leslie Turner
Leslie likes all the bold festive patterns in this collection. As we discovered last month, she loves creating paper shoes. She admits she doesn’t have any high heels in her collection, so she created a 3-D high heel for us using pretty dotted pattern paper in this month’s kit.

Using her electronic cutting machine with an SVG file, she cut the shoe base, insole and interior pieces from light pink cardstock, and the panels from a dotted pattern paper in the kit. She adhered a flower sticker from the sticker sheet to a scrap piece of white cardstock and fussy cut around it. After assembling the high heel, she adhered the flower embellishment with a thick double-sided foam circle.

The dotted pattern paper and flower embellishment in this collection made a casual but elegant high heel which would be a welcome addition to any paper shoe collection!


9. Let’s Celebrate Tag Card by Leslie Turner
Leslie likes all the birthday-themed papers, coordinating stickers and upgrades in this collection. She loves having a variety of birthday cards in her stash, and she’s particularly fond of florals and bold patterns, so this kit is a ‘win-win’ in her book!

She cut a 3-1/2” x 6” mini slimline card base from white cardstock along with layering panels from pink cardstock and a floral pattern paper from the collection. Next, she cut a matching floral tag from the collection and layered it on three layers of cardstock for dimension. She added a twine loop and flower portion of an icon paperclip from the upgrades to the top of the tag, as well as a scalloped border and sentiment sticker from the sticker sheet to the bottom of the tag. Then, she cut a die cut alpha from the upgrades in half and adhered the halves beneath the tag. The final touch was adding 5mm pink pearls to the bottom of the tag.

She cut the inside panel from white cardstock and embellished it with strips of the floral pattern paper and pink cardstock used on the front. Finally, she added a sentiment sticker from the sticker sheet and layered the panel on pink cardstock.

10. HB2U Card by Leslie Turner
Leslie loves all the birthday-themed prints and colors of the papers in this collection along with the coordinating stickers and upgrades. Birthday cards are at the top of her list of favorite cards to make and she loves having a variety in her stash.

She cut a standard A2 size top-folding card base from heavyweight cardstock along with layering panels from red cardstock and pattern paper from the collection. Next, she created a layered focal element for the card front using a notebook paper die in her stash and two additional papers in the collection. She added an icon paperclip from the upgrades as well as a floral sticker from the sticker sheet. The final touch was adding a strip of 3mm pearls.

Next, she cut the inside panel from white cardstock and embellished it with narrow strips cut from one of the papers in the collection. She added stickers from the sticker sheet and layered the panel on red cardstock.

11. Herringbone Mini Notebook by Leslie Turner
Leslie likes the versatility of the papers and coordinating stickers in this month’s kit. She loves making and giving practical gifts, so she created a fun 6x6 mini notebook with a herringbone background on the front.

She cut 6x6 front and back covers from heavyweight cardstock, and punched six holes across the top with her Zutter Bind-It-All. She created the herringbone pattern on a white cardstock panel using 1/2" strips cut from a variety of papers in the collection, and adhered the panel to a pink cardstock panel and then to the front cover. She adhered die cut alphas and two flower stickers from the sticker sheet to complete the front panel.

She trimmed a stack of notebook paper to fit the inside of the notebook, punched holes across the top, and assembled the notebook with a white Zutter wire.

12. You Did It! Split Panel Card by Leslie Turner
Leslie likes the bold colors and fun sentiments on the papers and tag elements in this month’s kit, along with the fun upgrades. She’s a ‘fancy fold fanatic’ and thought it would be fun to use layered tags on a split panel card.

Also, she cut a standard A2 size top-folding card base from heavyweight cardstock and created the split panel feature, leaving 1-1/2” sections at the top and bottom which she covered with a patterned paper from the kit. Next, she trimmed two tags from the kit, added ribbon from the upgrades, and layered them on heavyweight cardstock. She adhered them to the card front connecting the two panels and added two star stickers from the sticker sheet.

Then, she cut the inside panel from a patterned paper in the kit and adhered a strip of white cardstock across the bottom for a signature panel. She added an additional tag element and sentiment sticker from the sticker sheet which completed the card.

See more of Leslie’s celebrate scrapbook projects on her blog!
Join our exclusive Facebook Community for Club Members. It will grant you access to amazing layouts and content made by our design team, fun monthly contests, and FREE Facebook Live (September 21st) tutorials to meet other crafters!
Haven't subscribed yet? Now's your chance, be sure to sign up today!
GET OUR MONTHLY KITS DELIVERED TO YOUR DOOR!
