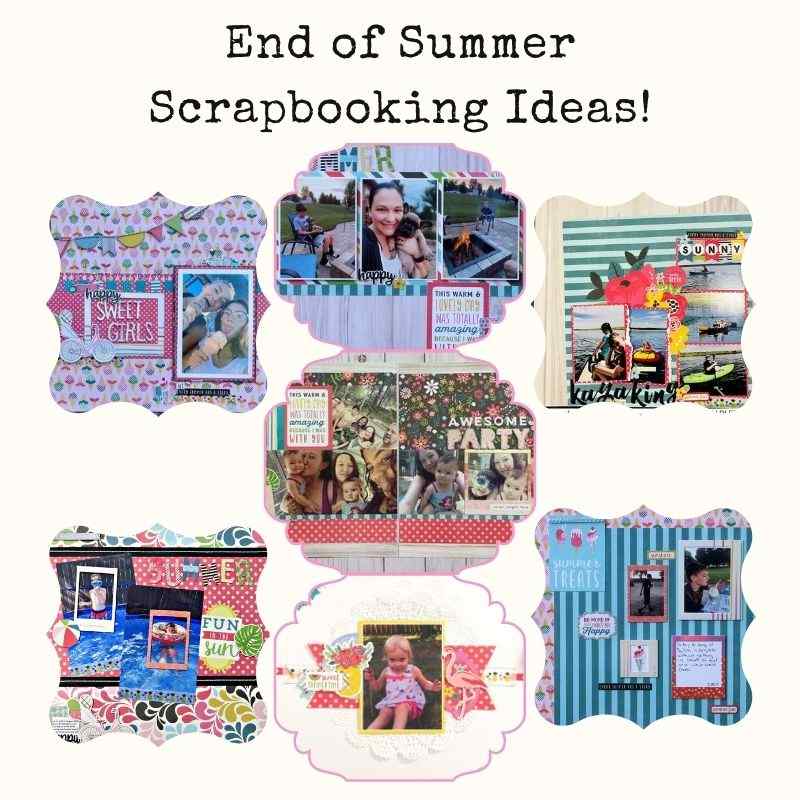
End of Summer Scrapbooking Ideas!
Summer's ending so soon! But don't fret- we're here to share a beautiful end of summer scrapbooking ideas. Take a look and we hope you get inspired by the creativity from our wonderful Design Team!
1. Sweet Summertime by Sara Mishler
For Sara's layout, she used the August main kit and Upgrades. She also used a few things from her stash: 2 sheets of white cardstock, yellow cardstock, and a large paper doily (8 inches in diameter). Sara chose the white sheet of cardstock as her base. Next, she created a “washi ribbon”. This couldn’t be easier! Just put a strip of the washi tape across the length of the cardstock and trim. Also, she added a bit of ink and cut a fishtail at each end. Done! You need two lengths of the washi ribbon-a 12-inch length and a shorter bit.
To create the main page element: Sara chose one of the sticker strips from the sticker sheet, cut some fishtail at the ends and place it across the middle of the page. She layered the washi ribbon on top, trimmed as needed so the sticker element is visible evenly on either end. Next, she adhered the large doily to the center. Finally, cut a strip of patterned paper 3 inches wide by 9 inches long. Fishtail the ends and placed it centered over the doily.
Sara chose two frames and a photo, she matted her photo with yellow cardstock. Then, she layered and adhered the two frames with the photo between them. The frames should be slightly under the photo and the photo will need to have some dimensional adhesive behind it so it can rest on top of the frames. Next, she filled the frames with a variety of stickers from the sticker sheet to create a pleasing arrangement.

In the top left corner, she strung the banner, trimmed and adhering each banner piece to the layout with wet glue and then gluing the ends to the back of the paper. Also, she fills the corner with a cluster of stickers.
For the bottom corner, Sara adhered a small strip of washi ribbon and a small strip of the border from the sticker sheet, fishtailing each end and staggering them. They should run off the side of the page. Finally, she placed the date of her photo. You may also add any journaling above the strips or add a couple small stickers to complete the look if needed.
Watch more of Sara's end of summer scrapbooking ideas on her YouTube channel!
2. Summer In The Sun by Marci Bensing
Here is Marci's first layout with the AUGUST KIT. It's so bright and colorful and exudes summer fun. Marci chose 2 photos of her grandson in their small backyard pool. She started with choosing some of the papers she thought she would use and put all of the embellishments around. Then, she proceeded with her basic background/placement.

That colorful flourish background paper reminded Marci of movement and water. She popped up and added the title "SUMMER". Once this is complete, she then went all around the page embellishing until she felt satisfied with the overall appearance and balance.


Note that Maci used the washi tape on the bottom of each photo! She also used one of the small frames to frame her journaling in the lower left. Marci can't wait to get started on her next project with this collection! She makes a lot from each kit every month.
Check out more of Marci's crafts and layout on her blog!
3. Kayaking Fun Layout by Meggy Blethen
This is Meggy's beautiful August layout! She is away from home on a two-week vacation right now and enjoying the summer with her scrappy friend. She was glad she got her August kit before she left, so she could bring it with her and scrap away. This month's kit is one of her all time favorite Summer Echo Park collections. She loves the bright pink with all the other summer colors in the collection.
Meggy knew right away when she opened her kit that she was going to use the amazing woodgrain background paper (Sweet Treats). Woodgrains always get the better of her! She gutted the side part so she will have some extra for other layouts this month. For the striped blue paper - Splash into Summer, she tilted it at an angle and cut the pieces hanging off the edge.
Then, she used the bright pink patterned paper (Summer Floral) to mat her photos because she wanted the color to contrast against the blue paper. The 3 photos on the right of the layout were cut to approximately 3X3.5 and then matted on the same piece of pink paper. The other two photos were cut to 3x4. She thought adding a tear to the right edge of each of the 3x4 would create a nice extra texture. Megan loves the gorgeous floral that is on the B side of the Summer Floral patterned paper. So she decided to fussy cut the biggest cluster out of the paper as a big embellishment piece between the photos.

Meggy used a lot of the stickers from the 12x12 element sticker sheet included in the main kit. There were a lot of cute phrases and little flowers that helped her create two other clusters. The "sunny" banner is super cute and she loves the colors that bring attention to the top photo. Also, she used a black alpha for part of the title from her stash as well as the word "fun" from the sticker sheet. She loves the cute washi tape that came in the Upgrade kit so she made sure to put that in this cluster. Next, she added a couple of flowers and a phrase sticker to the right of the title to finish it off.
These photos were taken on her husband's work retreat from 2018. They all had such a blast and tried so many new things as a family. Meggy loved going kayaking and wanted to make sure this was a memory that made it into the scrapbooks.


Regarding the title: for Custer 1(in the middle of the layout, she used a fussy cut big floral from the Summer Floral patterned paper in the main kit. Meggy added a couple of smaller stickers from the 12x12 element sticker sheet in the main kit. For Cluster 2 (top right photo), she used the "sunny" sticker banner from the element sticker sheet in the main kit. Also, she added a phrase sticker and 3 little florals from that sheet. Lastly, for Cluster 3 (bottom title), she used an Alpha from her stash for the word "kayaking", "fun" sticker and small floral stickers from the 12x12 element sticker sheet in the main kit.
Get to see more end of summer scrapbooking ideas in Meggy's YouTube channel!
4. Summer Nights by Melissa Bierlein
Melissa loves the colors of this kit. She started her layout by using a plain white cardstock for her base (from her stash). Next, she cut the beautifully colored paper in diagonal. There’s no precise measurement; she puts it in her trimmer at an angle and cuts! Then, she glued this down to the white cardstock and added the blue trim on the angled edge from the upgrades.
Photos were printed two to a 4X6” so each is 2X3”. Two of the photos were cut down more to fit behind the Dear Lizzy photo frames in the upgrades and were popped up with foam tape. The two remaining photos were matted with the teal stripe paper from the kit and some vellum (from her personal stash). These two are glued flat around the popped up photos.

She embellished the upper left corner with banners: one is a sticker strip from the sticker sheet, one paper and one washi tape that was part of the upgrades. Next, she popped up a little ’SUMMER FUN’ strip that she cut off from the bottom of one of the papers. Also, she added some banner pieces from the sticker sheet under the photo of her husband and his friend.
As for the lower-left embellishment cluster: Melissa puts three banner strips (one sticker from the sticker sheet and the other two are papers from the kit. She also cuts the flower pot off the Vespa on the sticker sheet, added some additional flower stickers to hide the handlebars and popped up on top of the banners. Lastly, she added the sticker ‘Every Summer has a Story’.


As for the title, she used a cut file ’Summer Nights’ from Design Bundles and cut it on Cricut. It was cut three times: two on black cardstock (from her stash) and once on the polka dot that came in the kit. The three cut files were layered to give the title more dimensions.
Finally, she added some glitter epoxy dots from Stampin’ UP (from her stash) in three places on the layout. We love how this layout turned out- very adorable and makes use of so many pieces from the kit!
Check out Melissa's wonderful layouts on her blog!
5. Summer Nights Layout by Samantha Taylor
August kit is perfect for all those things that make summer fun. This layout celebrates warm nights around the fire pit. Sam started with 2 pieces of patterned paper; the woodgrain paper and one of the bolder patterns. After adding her photos, she added additional pops of color with borders at the top and bottom of the layout.

The border on the top was created with the included sticker sheet and the border on the bottom was made with a mix of embellishments from the upgrade embellishment kit.


Finally, she added a journaling card in place of journaling and used a chipboard frame front from the upgrade embellishment kit.
6. Summer Treats Layout by Sam
Sam built this layout around 2 things - Ice cream and the chipboard frames included in the embellishment upgrade. they always look forward to having ice cream at the same place every time they camp at a certain campground. She thought it would be fun to use the ice cream patterned paper included in the kit with the photos.

She loves to use chipboard frames (like the ones included in embellishment upgrade) multiple ways. On this layout alone, Sam used them to frame photos, create a journaling tag, and to create a design element with other embellishments.


Sam finished up the layout with some sticker embellishments from the main kit. check out sam's blog to see more of end of summer scrapbooking ideas she shared using the August kit!
7. Happy Sweet Girls by Shannon Allor
Shannon started her layout by using the ice cream patterned paper. It was trimmed to 11 1/2” x 11 1/2” and then she placed it on the black floral patterned paper as a mat. The hot pink patterned paper with the white Xs was cut to approximately 4” and then a notebook punch was used on the top portion to create interest.
The sticker sheet had great banner pieces, so Shannon used them and she popped them up on foam and then placed near the top. The turquoise twine on top of the banner was adhered over each sticker piece to create a fun border. The photo was double-matted and popped up on foam to add a bit of shadow and dimension. Next, Shannon added the chipboard frame to anchor the title as well as to give the large bicycle sticker a place to rest.

Shannon added some Washi tape included in the Upgrades. She put them in three places to add a fun dimension and create a base for clusters. The turquoise mini banner completed the layout with a strong pop of color. Watch fun tutorials and end of summer scrapbooking ideas on Shannon's YouTube channel!
8. Awesome Party Scrapbook Layout by Lisa Brooks
These black florals are so beautiful. Lisa knew she wanted to use them as a focal point. These photos from a pool birthday party were perfect for this collection. The frame from the upgraded kit worked so well to highlight the photo of the birthday girl and her kids. The banner from the decorative trim was a perfect accent in the corner and matches so well with the stickers from the collections.

Check out how Lisa made this super easy double page layout on her YouTube channel!
Now is the time to really seas the summer days as you say goodbye. The tans will fade, but the memories you put in your scrapbook layouts will last forever."
Don't forget to visit our online store! We’re adding new items all the time and running a fantastic sale!
Join our exclusive Facebook Community for Club Members. It will grant you access to amazing layouts and content made by our design team, fun monthly contests, FREE Facebook Live tutorials (Aug. 19th) and you'll get to meet other crafters!
Haven't subscribed yet? Now's your chance, be sure to sign up today!
GET OUR MONTHLY KITS DELIVERED TO YOUR DOOR!