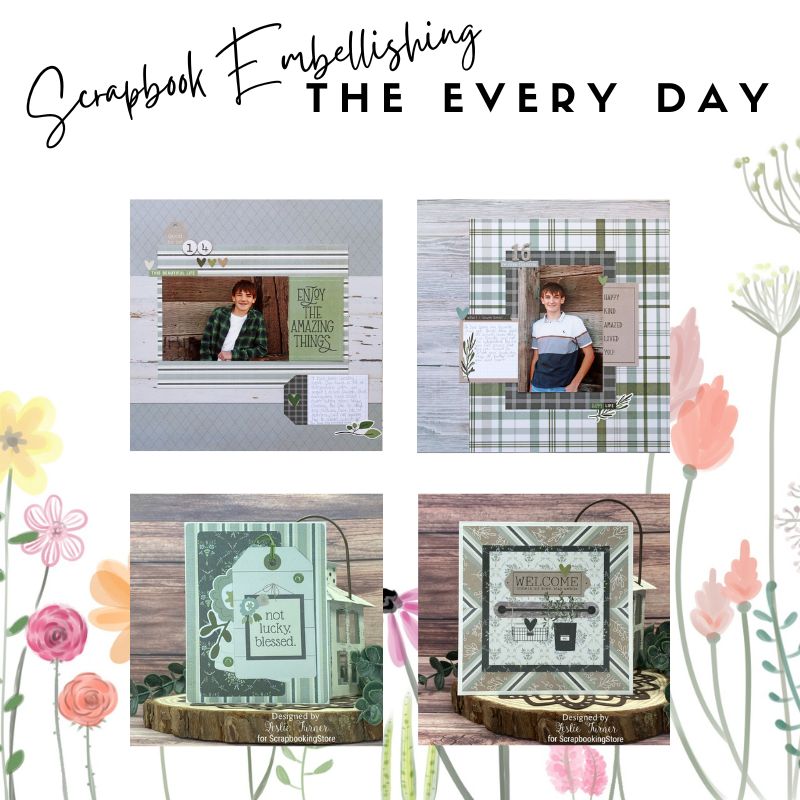
Scrapbook Embellishing the Every Day
We invite you to embark on a journey of simplicity and serenity with our April kit , the "The Simple Life" collection by Simple Stories. In this digital space, we aim to inspire and guide you as you capture and preserve cherished moments in a beautifully crafted scrapbook.
"The Simple Life" collection transports you to a world where tranquility meets creativity, where you can escape the hustle and bustle of everyday life and find solace in the art of scrapbooking. With its delightful patterns, charming embellishments, and versatile designs, this kit collection offers everything you need to encapsulate the essence of simplicity.
Whether you're a seasoned scrapbooker or just starting your creative adventure, our blog will be your trusted companion, providing helpful tips, creative ideas, and step-by-step tutorials to ignite your imagination. Join us as we celebrate the beauty of the ordinary, finding joy in the little things that make life truly extraordinary.
So, grab your scissors, select your favorite papers, and immerse yourself in the serene world of "The Simple Life." Together, let's weave a tapestry of memories, preserving moments that warm our hearts and bring smiles to our faces. Let's embrace the art of scrapbooking and discover the magic of simplicity.
Annual Photos Scrapbooking Layout by Samantha Taylor
To create annual photos scrapbooking layouts, Sam begins by gathering all the necessary materials. She selects muted colors, woodgrains, and lovely plaids that perfectly complement her sons' photos. Samantha prepares two separate kits—one for her 16-year-old son and another for her 14-year-old son. The kit for her older son includes the base kit and embellishments from the upgrade kit. The kit for her younger son consists of the base kit only. Additionally, Samantha grabs number stickers that are not included in the kit but will be used for both layouts.
She carefully chooses the annual photos of her boys that she wants to include in the scrapbooking layouts. She considers the essence of each child at that point in time, aiming to capture their unique personalities and interests. Selecting the perfect photos allows her to reflect on how much her sons have grown while cherishing the aspects of their individuality that have remained constant. Sam begins by preparing the base for each layout. She selects coordinating background papers from the kit that will serve as the foundation for showcasing her sons' annual photos. Using a trimmer or scissors, she carefully cuts the papers to the desired size and adheres them to sturdy cardstock or scrapbooking album pages.
With the base ready, Sam proceeds to place the chosen annual photos onto the layout. For her 16-year-old son's layout, she positions the photo prominently, making it the focal point of the page. Samantha uses adhesive or photo corners to secure the picture in place. Similarly, she does the same for her 14-year-old son's layout, ensuring the photo is placed prominently on the page.
To enhance the visual appeal of the layouts, Sam incorporates embellishments from the kits. For her 16-year-old son's layout, she utilizes the embellishments from the upgrade kit, carefully selecting elements that complement his photo and personality. She strategically places these embellishments around the photo and along the edges of the page, creating an aesthetically pleasing arrangement. On the other hand, for her 14-year-old son's layout, she uses the embellishments from the base kit, arranging them thoughtfully to enhance the overall design.

In order to add a personal touch and emphasize the significance of the annual photos, Samantha incorporates number stickers onto both layouts. These stickers represent the age of each of her sons at the time the photo was taken, adding a chronological aspect to the scrapbook. Samantha selects number stickers that complement the design and carefully adheres them to the layout, ensuring they are easily readable and well-placed.
To complete the scrapbooking layouts, Samantha takes a moment to review each page and make any necessary adjustments. She ensures that all elements are securely adhered and that the overall composition is visually balanced. Samantha adds any additional embellishments or details she feels will enhance the layouts, paying attention to the small details that make each page unique.
With the annual photos scrapbooking layouts finished, Samantha takes a step back and reflects on the journey of her boys' growth and development. She appreciates the opportunity to capture their personalities and preserve these precious memories in a tangible and artistic way. Samantha looks forward to sharing these layouts with her sons and relishing in the joy they will experience while reminiscing about their past.

By following these step-by-step instructions, you too can create annual photos scrapbooking layouts that beautifully capture the essence of your loved ones and commemorate their growth over the years. Remember to personalize the process by selecting materials and embellishments that reflect the individuality of each person in the photos.
Once the annual photos scrapbooking layouts are complete, Samantha considers how she will share and preserve these cherished creations. She may choose to display the layouts in a scrapbook album, allowing family and friends to easily flip through and enjoy the memories. Samantha may also opt to frame individual layouts or create copies to gift to her sons when they are older, providing them with a tangible keepsake of their childhood.


To add depth and meaning to the layouts, Sam takes the opportunity to document memories and anecdotes associated with each photo. She writes a synopsis or a short paragraph about her boys at that particular point in time, capturing their interests, achievements, and notable experiences. This documentation provides valuable context and serves as a narrative thread that connects the annual photos, creating a rich storytelling element within the scrapbooking layouts.
As Samantha completes her annual photos scrapbooking layouts, she reflects on the beauty of preserving memories and the joy it brings to her and her family. She plans to continue this tradition in the years to come, capturing new moments and milestones as her boys continue to grow and change. Samantha looks forward to the future, knowing that each layout will become a treasured piece of their family history.
By following these detailed step-by-step instructions and embracing the third-person approach utilized by Samantha Taylor, you can embark on your own journey of creating annual photos scrapbooking layouts. Remember to infuse each layout with personal touches, select materials that resonate with the essence of your loved ones, and enjoy the process of preserving cherished memories for generations to come.
Get to see more scrapbook embellishing layouts on Sam's blog now!
Simple Life Front Flap Card by Leslie Turner
Leslie loves family time and thinks the coordinating papers, stickers and upgrades in this month’s kit are pretty awesome. She’s a self-proclaimed fun fold fanatic and created a front flap card for us featuring paper, stickers and upgrades from the collection.
She cut a standard A2 size panel from heavy weight white cardstock along with a smaller panel with a scored flap from lighter weight cardstock and adhered them together. She covered the panels with two coordinating papers from the kit, and added a variety of die cuts from the upgrades and stickers from the sticker sheet in collage fashion to the front flap. She also added a sentiment sticker from the sticker sheet popped up on a foam strip and two black enamel dots from her stash.
She cut the inside panel (visible from beneath the flap) from lighter weight white cardstock and added a sentiment and coordinating scalloped edge element from the sticker sheet and layered the panel on black cardstock. See more of Leslie’s projects on her blog!


Blessed Tag Card by Leslie Turner
Leslie likes all the coordinating tags and cards that accompany the patterned papers in the kits each month, and for this card she used a couple tags as the focal element on the card front along with coordinating papers and upgrades in this month’s collection.
She cut a standard A2 size side-folding card base from heavy weight white cardstock along with layering panels from two coordinating papers and two tags. She selected a large floral die cut from the upgrades which she tucked between the tags, and added a couple green enamel dots from her stash.

She cut inside panels (one large and one small) from papers in the kit along with an additional tag. She added a sentiment from the sticker sheet which completed the card.


She cut the inside panel (visible from beneath the flap) from lighter weight white cardstock and added a sentiment and coordinating scalloped edge element from the sticker sheet and layered the panel on black cardstock.
Family Floating Tile Card by Leslie Turner
Leslie likes using stickers as the focal element on cards and employed the ‘floating tile’ technique with the letter tiles on this mini slimline which really packs a punch. The floating tile technique is similar to the floating strips technique where tiles (or strips) are adhered to acetate and then popped up on foam squares to achieve the look of ‘floating.’

She cut a 3-1/2” x 6” mini slimline card base from heavyweight white cardstock along with two layering panels and a flag from coordinating papers in the collection. She adhered the F-A-M-I-L-Y tiles from the sticker sheet to an acetate strip and popped them up on double-sided foam strips to achieve a ‘floating’ look. She added two floral die cuts from the upgrades and a sentiment sticker from the sticker sheet.


She cut the inside panel from a lighter weight white cardstock and embellished it with a leftover piece of patterned paper used on the front. She trimmed the sentiment from a card in the collection and layered it on a scrap piece of white cardstock.
Gather ‘Round Card by Leslie Turner
Leslie likes the nice variety of die cuts in the upgrades in this month’s collection and the fact that they make quick cards. She used die cuts along with two coordinating papers to create a dining room scene for this pretty family-themed card.

She cut a standard A2 size side-folding card base from heavyweight white cardstock along with panels from two coordinating papers in the kit to create the wall and floor for the dining room scene. She added two die cuts from the upgrades which completed the front of this quick and easy card.
Leslie cut the inside panel from a woodgrain paper in the kit and embellished it with a leftover strip of paper used on the front. She completed the inside with an additional die cut sentiment from the upgrades.


Square Striped Panel Card by Leslie Turner

She cut a 5-1/4” square top-folding card base from heavy weight white cardstock. She cut strips from two coordinating papers in the collection and created a diagonal pattern which she cut into four pieces. She rotated two of them and adhered them to the card base. She trimmed a journaling card in the collection and layered it on a coordinating print which was used as the focal element. She added one die cut heart from the upgrades and one heart sticker from the sticker sheet.


She cut the inside panel from a lighter weight white cardstock and embellished it with two leftover patterned paper strips used on the front. She layered the panel on another paper from the collection and added two sentiment stickers from the sticker sheet which completed the card. See more of Leslie’s scrapbook embellishing projects on her blog!
Visit our blog for more scrapbook layouts and crafts using our monthly kits!
Join our exclusive Facebook Community for Club Members. It will grant you access to amazing layouts and content made by our design team, fun monthly contests and tutorials to meet other crafters!
Haven't subscribed yet? Now's your chance, be sure to sign up today!
GET OUR MONTHLY KITS DELIVERED TO YOUR DOOR!
